
And so far I've done my SFX makeup on the spot
- With liquid latex and scar wax (See Halloween Terminator Look), or
- Built a latex prosthetic from ground up using latex and tissue paper, which is a tedious process and the prosthetic gets hard and stiff and basically quite difficult to reuse. (See Hongo Mio Scar)
This time I dabbled in making a mold to cast the SAME prosthetic more than once. Hey I needed a pair, so might as well make them as identical as possible yeah??
I'd like to say it was a GIANT success from the get go, but face it... lack of research, impatience and my other faults... well. I'm glad I FINALLY got some passable results.
So here I am... gonna go through step by step... the basic idea of re-creating the molding process, as well as, run through MY MISTAKES, so that everyone benefits.
LET'S GO!!!
(Pardon me for the lack of pictures... I was hasty to prep for Halloween :) , and... well... frustrated when things didn't go well... T.T)
Step 1: Sculpting
Yep, first we need to sculpt the prosthetic we want to make a mold of.Mine was relatively simple and flat, so I did it on an acrylic board.
Fully intended to be able to reuse the board... for other projects, but well... you'll see... later how I messed up.
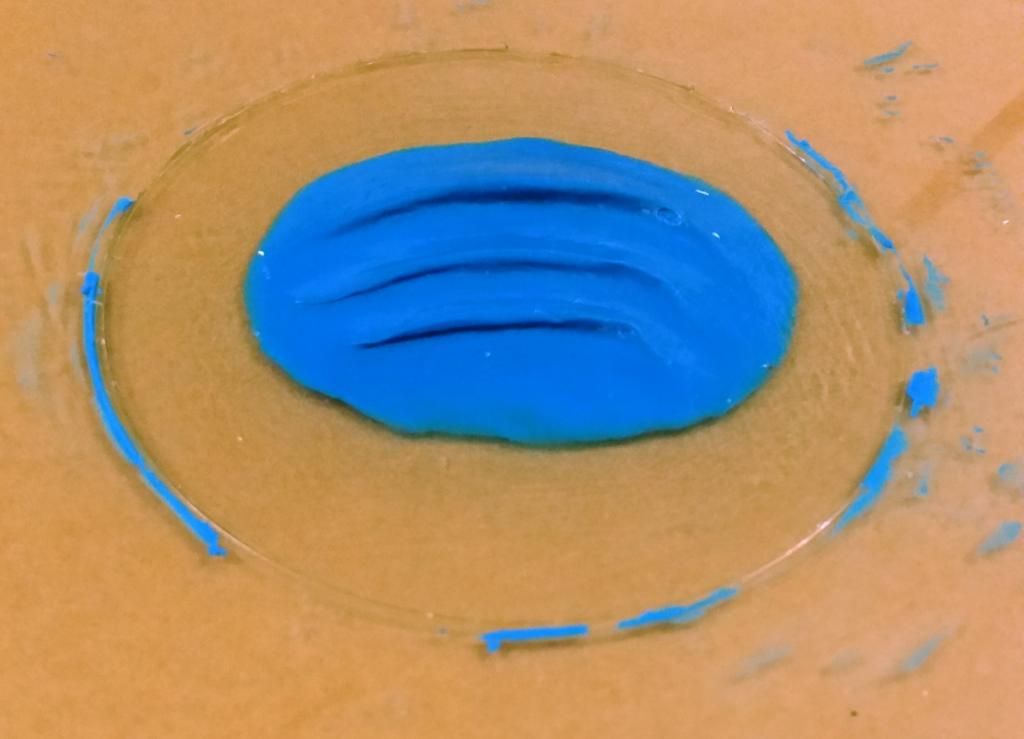 | |
| A late picture is better than none? Taken after de-mold, see the layer of varnish. |
Well... BIG MISTAKE.
I was going to make my mold using RTV Silicone and I read enough online reviews just before I intended to use it, only to find out that only a few kinds of plasticine were suitable to use with RTV silicone.
And since I only paid 80+ cents for this box... I HIGHLY doubt it was the Sulphur-free plasticine that could be used with the RTV silicone.
Apparently, sulphur based clays can retard or seize the curing process.
I was pretty much screwed... Since I planned on building the walls for the mold using the plasticine as well.
But hey. I spent hours sculpting the piece till I was happy... I wasn't about to clear it up and RE-SCULPT another out of water based clay, i.e.: paper clay, which has risks of it CRACKING as it dries and leeching stuff out of the silicone... since it is a porous material after drying.
So I read up on sealing the sculpt...
Few options came up, using acrylic spray paint, Mold release or equivalent, using PVA in alcohol.
I was kinda running out of time... since I didn't have time to go out and buy more supplies. Working sucks... I end at ridiculous hours.
I dug up a bottle of Acrylic Satin Finish Varnish, which was really quite thick and viscous.
Tried to dilute a small amount in 70% Isopropyl alcohol, in hopes of getting a really thin coat, well.. that didn't go all that well.
The varnish started forming lil clumps and balls, oops.
Ok. I gave up and used it neat. Downside is that brush marks were left on it, but hey, it worked! Gave it a double coat since plasticine is water repellent and the varnish was water based, some areas weren't well covered.
Before we go on to step 2... Let's recap.
Learning points:
- Use of plasticine may have resulted in failure.
- Need for acrylic varnish to seal, resulting in not able able to reuse both plasticine and acrylic base board, and also brush marks on the sculpt.
- Don't try to be a smart alec and dilute the varnish.... had to pick out lil balls of varnish from the surface of sculpt.
Step 2: Making the Mold
For the walls of the mold, I found this plastic container that used to house Watson brand cotton buds, cut off the base and then used a snake of plasticine to seal the outside edge of it. And of course, proceeded to smear it in the same acrylic varnish...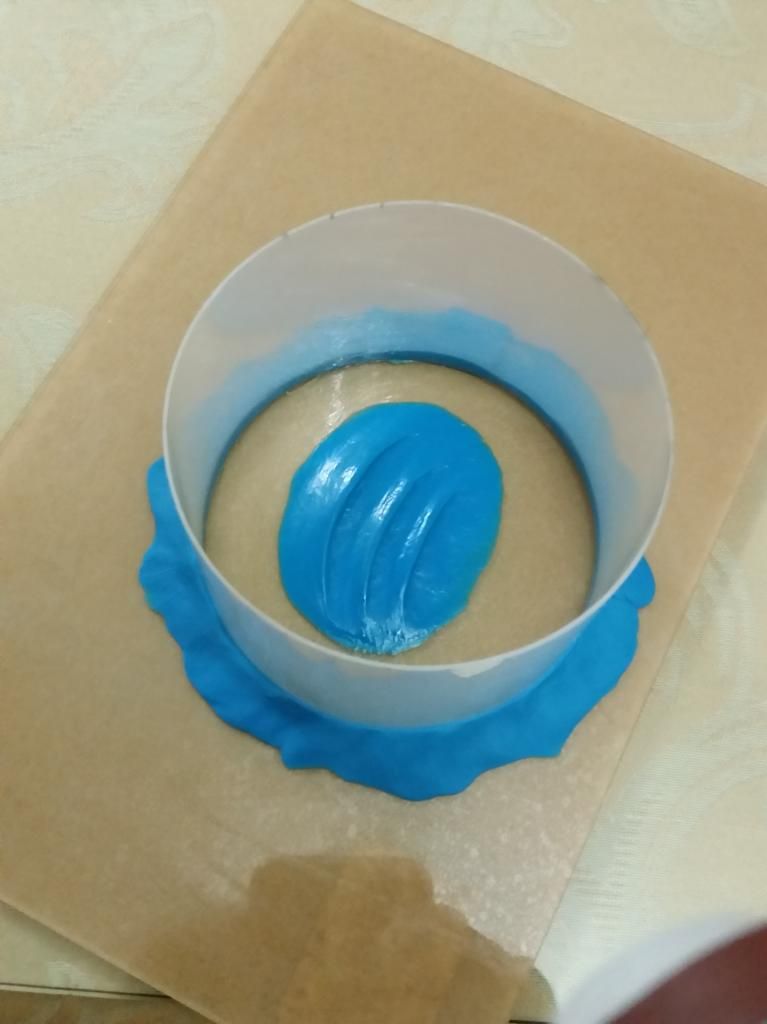 |
| Sawed off the bottom of the plastic container to use as a wall!! |
The silicone comes with it's own catalyst, and according to instructions catalyst should be 2-3% of the weight of the silicone used. It went on to say pot life of the silicone is 30 minutes at 20 degC, and can be de-molded at 3 hours.
Seems quite straight forward right?
Well first aggravating thing is opening the damned tin. 2 metal clips securing the lid... and then when I tried to pry the lid open... it DEFORMED rather than popping open...
=.=
On to the calculations, I previously calculated for a generous height of 1.5cm, i would need approximately 70mL of the silicone... so after converting it to weight (the tin gave the density of the silicone), I needed around 100g, which would need 2mL of the catalyst minimally, which equated to 80 drops.
Ok poured around 100g, note... NEVER do this near the window. The wind provoked a mess.
Cleaned up the mess and continued.
Time to drop the catalyst in. I expected a slow drop drop drop so I could count.
No. Free flow, dammit. A bare tilt of the bottle results a steady stream of drops, unaware, I flipped the whole darned thing over, ok... umm.. I think that was about 20 drops? I need another 60 or so... I think.
Ok, now to mix. The silicone is white and the catalyst is blue, so basically mix it until no more streams of blue. T.T not easy. The silicone is viscous, and not accepting of water based catalyst.
Ok after about 3 mins of stirring, I prepared to pour...
From all the vids I watched on youtube regarding casting, I was supposed to pour in a thin steady stream. Mmm... it's kinda... not doing that. just glooping I guess...
Well... so much for the 30 minute pot life, I forgot Singapore isn't 20 degC...
It started curing as I was pouring the last dregs... so... it did NOT smooth out...
I thought it would... so I have a flat level base... sigh.
=.= what's done is done...
Before we go on to step 3... Let's recap.
Learning points:
- Conduct this process... out of the wind
- I think it's quite safe to say you can use lesser catalyst... in our hot climate, heat causes the silicone to cure faster.
- Use more caution when pouring out the catalyst.
Step 2.5: Demolding and... tidy up
(Unnecessary if you perfected the previous step)3 hours later... and I suspect I could have demolded it earlier...
I extracted it.
Largely it was fine... but quite a few air bubbles and pockets... and well the giant lump at the bottom...
No way I am going to trash this... that RTV silicone was expensive!!
I wedged it upside down in the plastic piece for the wall of the mold, and used a penknife to saw off the lump, with the plastic cylinder as a guide. I managed to make it kinda flat... but not really level... at least not enough...
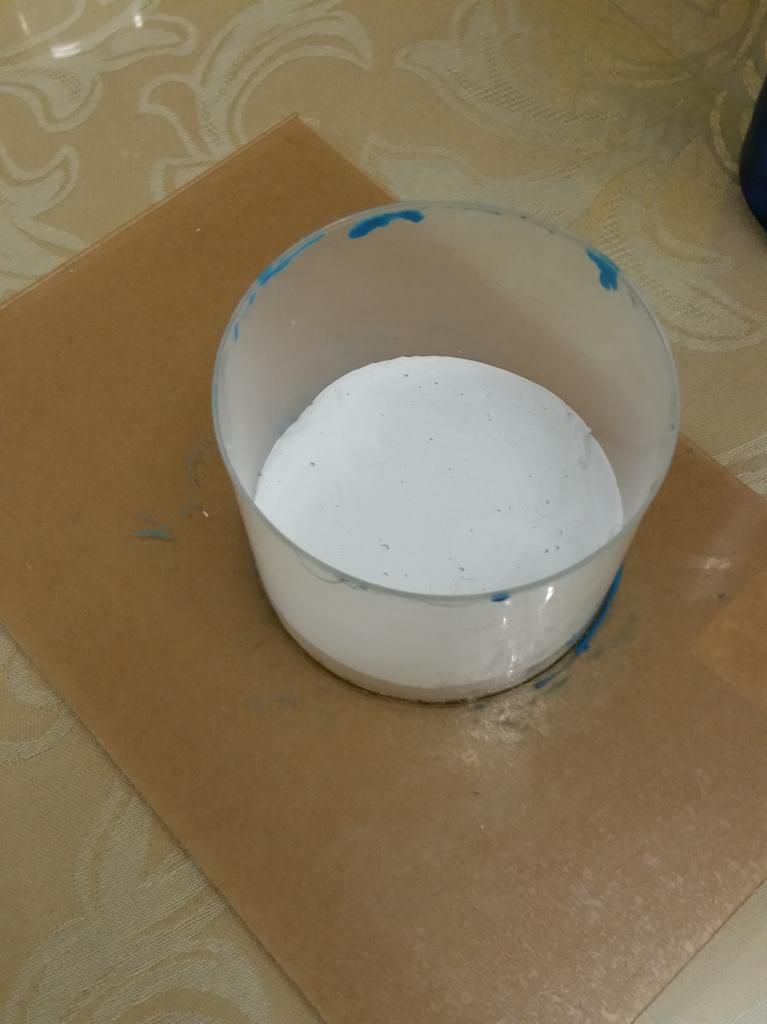 |
| What I hoped the mold to come out as... yes, this is a pic of AFTER the heinous sawing |
Proceeded to use a spatula to puncture pockets on the surface of the mold and fill the existing bubbles. After repeated scraping and patching over... I finally got it to an acceptable level.
Sure the surface wasn't smooth and pretty... but the scraping helped minimize the bumpiness...
Alright... now to let it sit and fully cure... since it was still kinda tacky.
Step 3: Preparing the gelatin base.
I decided, quite last minute, to use gelatin instead of liquid latex.My small bottle of liquid latex was quite sad and frankly I should throw it away... It was not a good idea to store it horizontally... it formed this film on the sides of the bottle and when it dried... more liquid latex adhered... and basically I had v little useable latex.
I still have a fairly giant bottle of unopened Mehron liquid latex though.
Alright so first time doing this. And boy, it was a downright sticky mess to work with.
Basic ratios... quite simple.
Gelatin : Glycerin : Water
1 : 1 : 1
The smartest thing I ever did in this whole entire process... was to color the water before I mixed in the Gelatin or Glycerin.
I used Acrylic paints to make a skin tone color, roughly near my own. Colors I used include Titanium white, sierra brown, ochre yellow and a green.
I did this on the fly, but I have created skin tone color a few times already before, and google was ever so helpful the first few times, I'd advise to consult Google.
Alright, you don't need a thick paint, just enough to tint the water the right color, so that there's less work later on.
For me I used a tablespoon for each. Not really exactly....
I used the back of the paint brush I was using to mix the Acrylic colors, to stir it.
Into the microwave for 20 second bursts, stirring in between.
Wow it got hot fast.
But the crystals of gelatin weren't dissolving... Total of 1 minute so far, I could see a reduced amount of gelatin crystals... but still a dang lot.
Popped it in for another 20seconds...
MAYHEM.
Opened the microwave and was greeted by the sight of the gelatin actually doing a volcano.
It just... surged over the edge of the container... ran down and pooled on the microwave turn table thingy.
T.T
Well it was hot and messy... I had to take the whole turn table out to stir it. The whole time I was trying to figure out if I burnt it by accident...
Well turns out it was fine... and I managed to salvage the gelatin on the sides of the container... but not the puddle on the turn table... being too hasty... I didn't wait for it to cool and peel it off... but tried to scrape it off... while it was still warm, and needed to use water to get rid of the sticky mess on my hands...
Before we go on to step 4... Let's recap.
Learning points:
- Color the water first. Really. the melted gelatin mix is not that easy to stir.
- Maybe try shorter bursts...
- When cleaning up gelatin... wait, be patient, it peels off easily when cooled and solidified, though still sticky.
Step 4: Casting and finishing the Prosthetic
So once the gelatin base is made, it melts pretty fast in the microwave.One burst of 20 seconds, stir and another burst of 5 seconds to make it a bit more fluid.
Pour it into the mold, sort of tilt it to spread it out into the grooves.
Quickly place my metal palette over it, FLIP the whole thing over and give it a good squish, until the excess gelatin starts oozing out from the sides of the mold.
I found this was the best method to get better edges and it overcame the fact that my mold was not level.
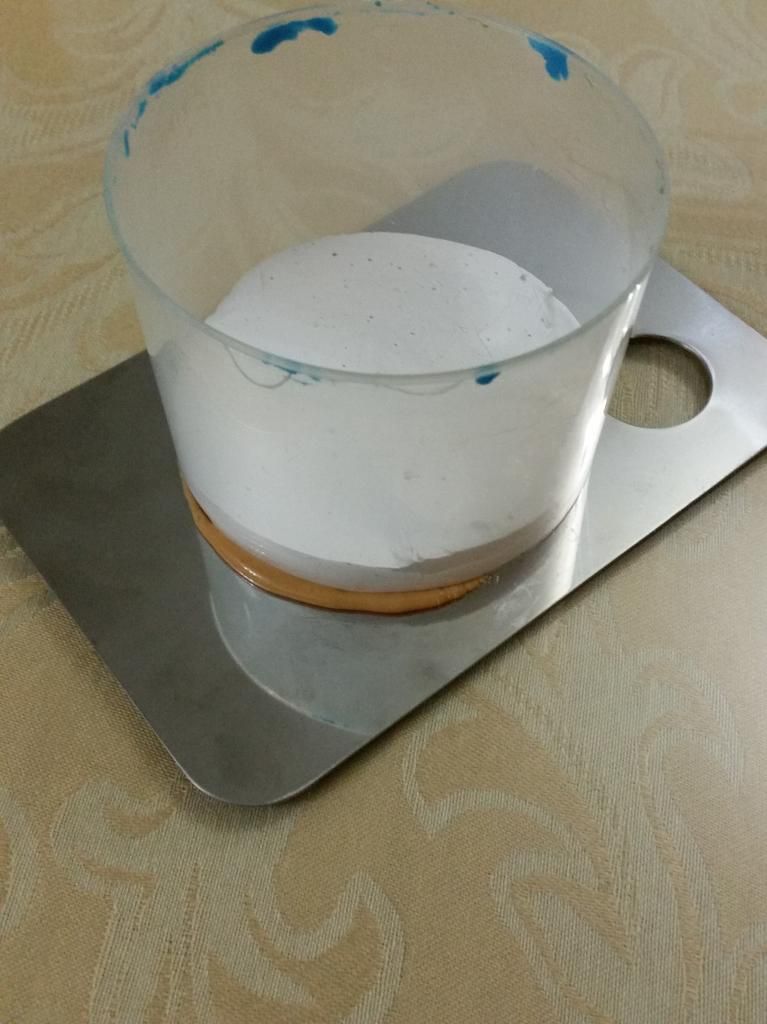 |
| Ooze |
I had to redo this 3 times, to get a satisfactory piece to finish up.
A quick run through on my 3 pieces, the first 2 were remelted, none went to waste.
- First attempt:
- I was hasty, and removed the mold before the gelatin set, so it kinda lost it's shape a bit. -Yes, this seems to be a running trend-
- One of the ridges kinda... slumped.
- But the edges, wow, the edges were pristine and thin... I wouldn't need to finish the piece if I had just let the bloody thing cool as it ought to.
- Peeled it off and thrown back into the gelatin container for a recast.
- Second attempt:
- Ended with a good likeness of the ridges.
- But no, I was too gentle with the squishing of the mold down, the edge was at least 1mm thick.
- Nope that would definitely NOT blend.
- Same process, recasted.
- Third attempt:
- Overall, quite good.
- The ridges were there.
- Most of the edge was pretty darned thin.
- But a couple of spots weren't, and I would have preferred the thinning to occur closer to the piece.
- Settled for it.
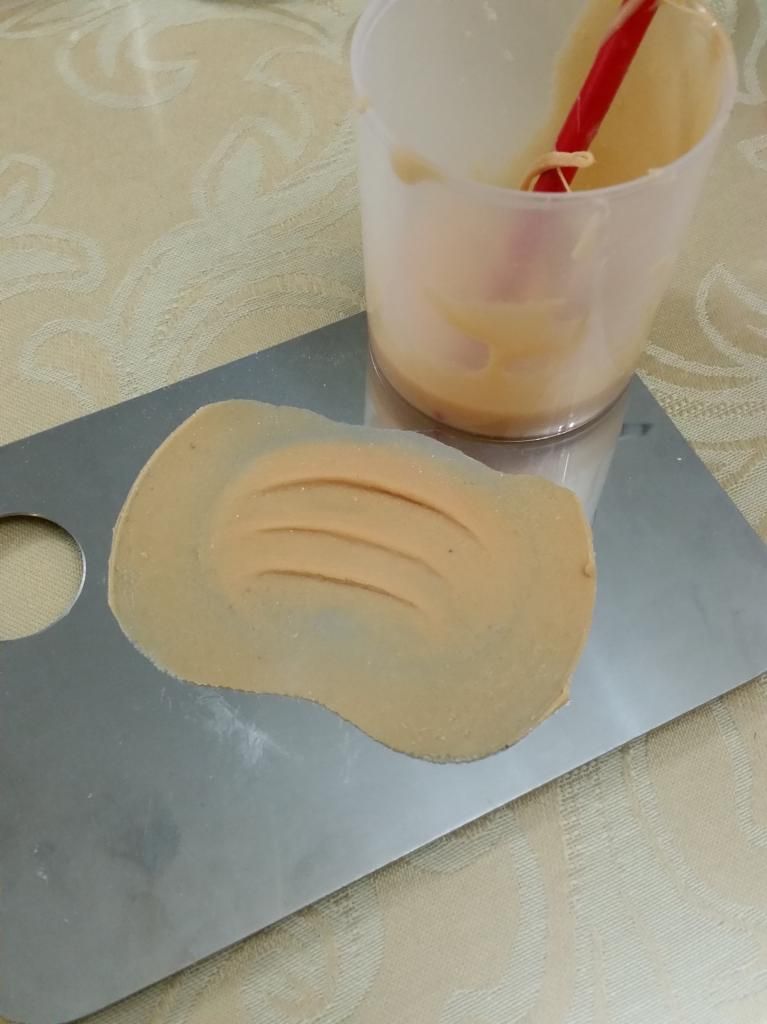 |
| Yep, looks pretty darned good. |
Since it IS gelatin, I thought I could blend the edge down. Tried two methods.
- Method one - Hot water on a brush
- Didn't seem to do much...
- Quite worried it might affect the integrity of the piece
- Method two - Melting the gelatin on the edge specifically
- Entails the dipping of the metal spatula into HOT water, wiping off the water and applying it to the edge of the prosthetic to melt it before sliding it at appropriate angles to taper off.
- Appropriate angles are not easy to achieve. I accidentally cut into the prosthetic a couple of times and had to go back over it trying to hide it.
- HOT means HOT. After a few passes, the spatula doesn't get hot enough to melt the gelatin. Had to reboil water quite a few times. You know it's melted when you slide the spatula and reveal shiny gelatin. If the gelatin drags... it's not going to work...
 |
| This is the blending process for a second piece for the pair. Right messy side, is blended, left has obvious edge |
And to finish it all off...
Powder the heck out of it, I used the E.L.F. High Definition setting powder, which mattified surface as well as take the stickiness out. when the top is no longer sticky, slowly peel back the gelatin piece and powder the bottom.
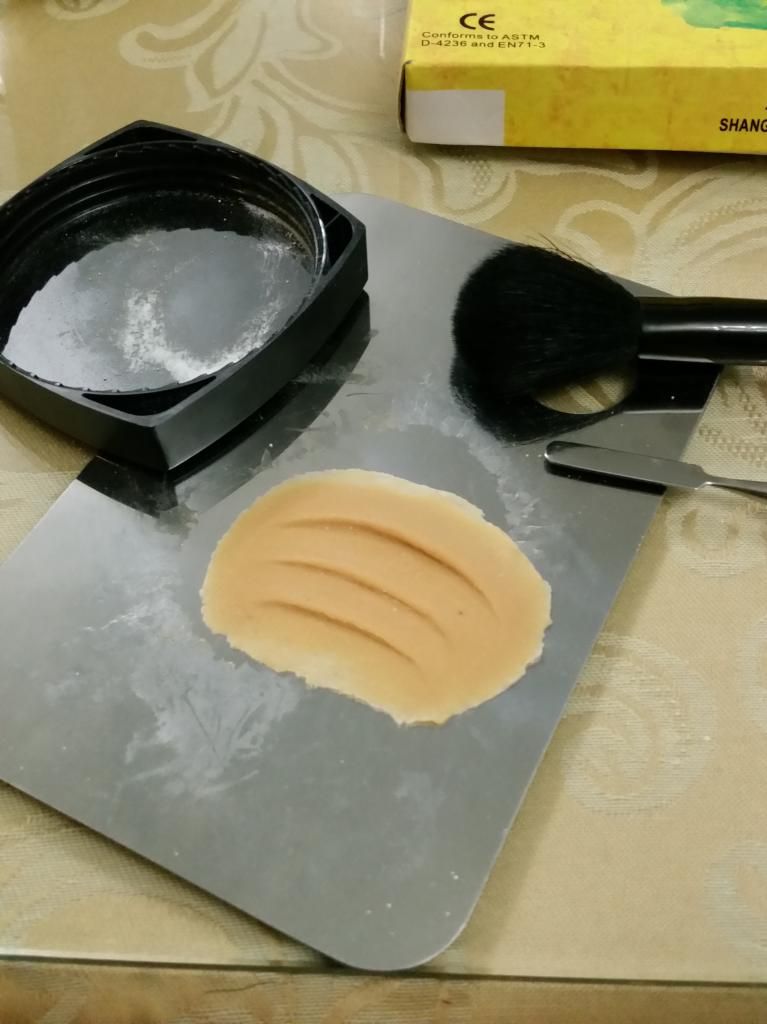 |
| Voila, gelatin prosthetic ready for application |
YAY!
Coloring and what not another day... This is prep for Halloween after all