Welcome to...
A Slice of Magic
The name was inspired from the manga "Beauty Pop". Koshiba Kiri's catchphrase, "I'll help you guys add a little magic", reminded me that anyone can become beautiful, with a touch of magic~

Please email kouzukeran@hotmail.com for enquiries and requests.

For more information and some light humor, please read the FAQ

Please visit my PORTFOLIO to view my past works.

Kouzuke Ran Artistry now has an official Facebook Page!

ALL COMMISSION JOBS ARE SUSPENDED AS OF 24/6/13.
Due to full time work commitments after joining the workforce.
However, any MESSAGES sent to our Facebook Page will be responded to if advice is required.
__________________________________________________________________________

Saturday, December 22, 2012

#08 - Long Wear Makeup Made Easy

Ok, so... I took a leaf out of Wayne's book.
I really admire him and as I said before, I trust MALE 'gurus' more than female ones on Youtube.
Wayne is really THE BEST. When I first came across his videos, I thought, "OMG. FINALLY SOMEONE WHO AGREES WITH ME ON NOT USING A STUPIDLY PALE CONCEALER FOR YOUR UNDEREYES!"
Then I discovered neat tips and tricks by watching more videos.
So... yeah, people check him out on Youtube! His channel is called gossmakeupartist.

Well... not everything is from Wayne, but he's an inspiration for this piece, undoubtly.

For each tip, I'll be stating how it performs or how likely it is to work for you.
Remember, every person is unique. What works for me, may not work for you, vice versa.
Also you CAN COMBINE many many tips to get a much better outcome.
So please take everything with a teeny pinch of salt!

So... let's get kicking!!


#1 - Primer
This was covered in much detail under #02 - Prepping your skin.
To avoid this post being too long, please head straight there for more detail.

A primer is good for people with combination to oily skin, as it can absorb oils.
If your makeup is 'sweated off' in the heat, then... this may not be the best solution.

A primer also provides a good base for makeup to adhere to.
It is able to smoothen the skin, to some extent, help colors look more vibrant, as well as help your makeup stick to your face.

I do use a face primer for myself and clients on event days.
I'm currently using the NYX Studio Perfect Photo-Loving Primer.


#2 - Choose Long Wearing Products
Ok, so this isn't exactly a tip.
Everyone will definitely want their products to be long wearing... but how do you know if it is?!
Let me give a teeny bit of advice.

Foundations:
Look for foundations which advertise 16hrs of wearability.
Logic dictates that ones that state 24hrs would be even better, but take note that some 24hr formulations tend to set very quickly so you might not be able to blend it out in time.
(i.e.: the new formulation of the Revlon Colorstay Liquid Foundation is 24hrs compared to the old one which is 16hrs)

Lipstick:
Before I start on this... let me say that... lipsticks will NEVER stay on more than ~3hrs.
You do have to reapply it, especially after eating.

However, you may choose to find a Lip Stain OR a Lip Paint.
Lip Stains will leave a sheer tint to your lips which lasts fairly long.
Lip Paints on the other hand, are highly concentrated with pigment and a very little is sufficient ans as they are extremely viscous in nature, do stay on much longer than lipsticks.

I'm currently using the SLEEK Pout Paints, which are an alternative to the Obsessive Compulsive Cosmetics Lip Tars.

Mascara:
There are many many types of formulation (drier or wetter formulation) as well as many many types of mascara wands.
I can't tell you in words which are better...

BUT, for a mascara in terms of staying power, look for WATERPROOF mascaras.
ok, duh... but that's not all.
Unfortunately, you have to test out the mascara for a couple of times to determine how 'flaky' it is.
If you feel that your lashes become dry and brittle or you find lil black bits falling off over the day... it is NOT your ideal mascara.

This differs for everyone because everyone's method of applying mascara is different.

Eyeliner:
Ok, generally... this is the rule about how long eyeliners wear
Gel >= Liquid > Pencil

Gel eyeliners work for 90% of people. The other 10% are like me and have superpowers that melt eyeliner like crazy.
Liquid eyeliners... well... some aren't waterproof and then some are just crappy.
Pencil eyeliners will not last more than 1hr. You'd end up with a very smudgy line or a non-existent one after 1hr.


#3 - Makeup Setting Spray / Finishing Spray
Ok... this is one EXPENSIVE PRODUCT but it WORKS.
A good one will not only 'set' your powder makeup, but also make it look more natural.
Note that this product is to be used over POWDER products on your face.
If you spray if directly on your face covered with liquid foundation, don't expect it to last much longer.

I'm currently using Skindinavia Cool Flash Makeup Finish.
This particular product is designed so that your face, after spraying, will feel less hot and produce less perspiration.
Unfortunately, I had to spree this item over and it cost me a small bomb...

Similar products available in Singapore are sold under Urban Decay, but... here's the catch. Skindinavia makes them.


#4 - Hairspray
This... isn't highly recommended... for reasons below...
BUT if you are going to under some very hot spotlights, it is a trade secret in the industry.

Rather than the makeup setting spray or finishing sprays, makeup artists behind the scenes on runways, use cheaper hairspray instead.
It definitely holds the makeup on as well as, if not better than, setting sprays.

BUT!
Hairspray will clog up your pores, therefore... giving you more skin problemsAND sometimes leave a shiny finish to the skin.
To remove the shine, lightly pat a layer of powder (foundation, setting powder) over the DRIED hairspray on your face.


#5 - Layering Product
Many people underestimate layering.
They just slop on a thick layer of liquid foundation and call it a day.
Nope, that will DEFINITELY slide off within 2hrs.

Layering means to do thin coats of the product and let that dry before applying another coat.


#6 - Setting Liquids and Creams with Powders
Very basic technique.
After you applied your layers of foundation, lightly go over with a pressed powder or a powder foundation.

What people don't know... is that they can do the same for blush.
Apply a cream blush (i.e.: the new Jelly blush by Maybelline) or a lil bit of lipstick in a suitable color to act as a base and blend it out.
Then top it off with your powder blush for more vibrant and longer lasting color.

Same with Eyeshadows!!Use a cream eyeshadow or a gel eyeliner in the correct color as a base and then apply your eyeshadow!!!

The same is recommended for gel eyeliners... but honestly, it didn't do any good for me...
I got raccoon eyes within 10minutes. I guess my black eyeshadow was too black!! haha


#7 - Eyebrow gel
If your eyebrow color doesn't last long enough, apply a thin coat of eyebrow gel or clear mascara over it.
TheFaceShop carries a clear mascara which is fairly generous in size.


#8 - Blot
If your face gets oily, you can blot with the oil absorbent facial papers.
If you perspire a lot, blot gently with a tissue. Please take a look in the mirror to make sure that there isn't any bits of tissue stuck on your face!!


Alright mateys, I'm turning in soon and my brain is mush.
I can't dreg anymore tips from my brain at the moment, so... well... I'll update this note if I DO think of sommat.

Tesun

Friday, December 7, 2012

#07 - Brushes vs Sponges Part 3 (Eyes)

Following up with the next installment!!

Yep, we are continuing in the same confusing manner.

Today, we shall go through:

Brushes:
 - Flat Shader Brush
 - Fluffy Blending Brush
 - Crease Brush
 - Pointy-type Liner Brush
 - Angled Liner Brush
** We will not be touching on Pencil or mascara brushes, either because I have no experience with them or because this will get too long!

Sponges:
 - Eyeshadow Applicators
 - Felt Tip Applicators (Just throwing this in to make it slightly more balanced!)


1. Flat Shader Brush
Well, as the name implies, this brush has a flat ferule, and the bristles generally form a gentle arc.
The main purpose of this brush is to apply eyeshadow.
There are many variations to this brush, so let's get a brief coverage on the general bits.
The brush can be densely packed or medium packed bristles, the more densely packed, the more pigment it picks up and applies.
The brush can also be made of natural hair bristles (e.g.: goat, squirrel... etc) or synthetic bristles.
Synthetic bristles are preferred for liquid and cream products.

Pros:
- Comes in many different sizes. Can choose a suitable size for any use.
- Versatile, you can basically use it for other purposes (e.g.: concealer)
- Good for packing on color for more vibrancy
- Can be used to blend colors

Cons:
- Some may have stiff bristles which irritate the skin
- Difficult to blend eyeshadow out

Method of Application:
1. Gently dab the side of your brush into your eyeshadow pot, drag it across a couple times IF the eyeshadow does not want to transfer
2. Tap the brush gently against the side of your table, palette or compact mirror (anything actually...) to prevent fall out.
3. Press the side of the brush against your closed eyelid. Dab until you cover the entire area desired.
4. Repeat steps 1-3 until you get your desired effect.

Sponge Equivalents: (See Below)
(a) Eyeshadow Applicators


2. Fluffy Blending Brush
Yep, it's fluffy.
Generally, this brush has a round ferule, with medium packed bristles.
The length of the bristles vary. Shorter bristles pack more color and longer bristles blend out eyeshadow better.
The bristles are generally shaped into a dome shape.

Pros:
- Good for blending (duh...)
- A shorter bristle brush can also replace the use of a Flat Shader Brush. A good one is the e.l.f Blending Eye Brush.
- Longer bristle brush is good for people who are afraid of applying too much eyeshadow/ want to build up their eyeshadow gradually.

Cons:
- Loses it's shape fairly easily
- Result heavily dependent on technique

Method of Application:
-Packing on color-
1. Dip the bristles into the eyeshadow pot.
2. Tap off the excess
3. Dab the bristles against your closed eyelid
4. Repeat steps 1-3. It probably will take longer than a Flat Shader Brush
-Blending-
1. Dab the bristles into the LIGHTER colored eyeshadow pot.
2. Tap off the excess
3. Place the brush at the part of your eyelid already covered with the darker eyeshadow color
4. Lightly buff the eyeshadow out with teeny circular motions while moving the brush left to right across the eyelid.
5. Repeat steps 1-4 as many times until blended.

Sponge Equivalents: (See Below)
(a) CLEAN Eyeshadow Applicators


3. Crease Brush
Fairly similar to the Blending brush but often is smaller with shorter bristles.
The shape is usually slightly more pointy than the blending brush too!
Usually used to help define the crease of your eye with a darker shade of eyeshadow.
The crease is the part of your eyelid which corresponds to the space between your eye socket and your eyeball.It does NOT hurt to press lightly on that area.

Pros:
- Smaller brush head allows it to fit into the 'crease' of your eye easily
- Able to place color more accurately
- Shorter bristles allows you to concentrate more color into the crease

Cons:
- Loses it's shape fairly easily
- Result heavily dependent on technique

Method of Application:
1. Dip the bristles into the eyeshadow pot (try not to get a lot of product on the brush)
2. Tap off the excess
3. Locate the crease (with your finger, if you are not familiar with it position), position the tip of the brush on the outer side of the crease (i.e.: the side further away from your nose)
4. Lightly move the brush over your crease in a windshield wiper motion, back and forth.
5. Repeat steps 1-4 as necessary to get the desired intensity.

Sponge Equivalents: (See Below)
(a) Eyeshadow Applicators (Not really good for this though)


4. Pointy-type Liner Brush
Well... This brush comes to a sharp point, yes, captain obvious.
Eyeliner brushes are usually made of synthetic bristles. In general.
The bristles are usually pretty stiff to improve control.

Pros:
- Stiff bristles allows for more control when lining your eyes.
- Synthetic bristles are good for liquid and cream products (e.g.: gel eyeliner)

Cons:
- Stiff bristles might be too harsh for people with sensitive skin
- Splaying of bristles/brush losing it's shape. Defeats the purpose it was designed for

Method of Application:
1. Scoop out some gel eyeliner using a disinfected spatula to reduce/prevent contamination of the main pot.
2. Dip the tip of the brush into the scooped out eyeliner.
3. Lay the brush such that the side of the bristles is in contact with a clean portion of the spatula/back of your hand.
4. Gently roll the brush back and forth to create a nice point to the bristles.
5. Place the brush against your lashline and draw a line. The eyelid tends to move less if you draw from the inner corner to the outer corner.

Sponge Equivalents: (See Below)
(b) Felt Tip Applicators


5. Angled Liner Brush
This brush has a flat ferule, and usually is made of short synthetic bristles.
The bristles are cut and arranged in a manner such that they form into a slanted shape, much like a tetrahedral on it's side.

Pros:
- Larger surface area to be in contact with your lashline, makes eyelining faster and easier.
- Slanted/Angled shape helps as it can follow the contour of your eye, distributing the pressure from the hand more evenly.
- Synthetic bristles are good for liquid and cream products (e.g.: gel eyeliner)
- Less likely to lose it's shape

Cons:
- Need to find a brush with a good amount of bristles to make it stiff enough but not too much that it makes a fat line.

Method of Application:
1. Scoop out some gel eyeliner using a disinfected spatula to reduce/prevent contamination of the main pot.
2. Dip the tip of the brush into the scooped out eyeliner.
3. Lay the brush such that the bristles on the angled edge is in contact with a clean portion of the spatula/back of your hand.
4. Gently move the brush back and forth to make the bristles form a thinner edge.
5. Place the brush against your lashline and draw a line. The eyelid tends to move less if you draw from the inner corner to the outer corner.

Sponge Equivalents: (See Below)
(b) Felt Tip Applicators


(a) Eyeshadow Applicators
These are the sponge tip applicators you get when you buy a eyeshadow duo/trio/quad/palette.
They can be dual or single ended.

Pros:
- Very easily obtained. Do not need to buy separate from the makeup.
- Good for packing on eyeshadow for more intensity.
- Can be used to blend eyeshadow

Cons:
- Blending eyeshadow can make the colors muddy, especially if you do not use a clean applicator
- Foam tends to absorb a lot of product.
- Foam also absorbs oils and dirt from the face and air, is a good breeding ground for bacteria
- Not durable. The foam tends to fall off the plastic handle after a while
- Not easily washed/cleaned. See "#05 - Brushes vs Sponges Part 1 (Hygiene)" for more details.

Method of Application:
-Packing on eyeshadow-
1. Press the side of the applicator against the eyeshadow and firmly wiggle it a couple of times to pick up color
2. Tap off excess product if the product is very powdery
3. Gently pat on the eyeshadow onto your closed eyelid
4. Repeat steps 1-3 to get desired intensity
-Blending eyeshadow-
1. Apply both the darker and lighter shades of eyeshadow as described in packing on eyeshadow
2. Using a clean side of the applicator, pick up a little bit of the lighter shade of eyeshadow. Tap off the excess product if needed
3. Place the applicator at the border where the 2 colors meet.
4. Gently move the applicator across the border while wiggling it slightly to blur the border.
5. Repeat steps 1-4 till you obtain the desired result.

Brush Equivalents: (See Above)
1. Flat Shader Brush
2. Fluffy Blending Brush
3. Crease Brush


(b) Felt Tip Applicators
Normally comes attached to liquid eyeliners.
Either as the pen nib in the pen-type liquid eyeliner or the applicator of dip-type liquid eyeliners.

Pros:
- Easy to use, more beginner friendly than brushes
- Dip-type: Picks up a lot of liquid eyeliner, need to redip less to line the eye.

Cons:
- Easily loses it's 'shape' (i.e.: condition where there's lil fibres or wonky bits attached to the tip)
- Dip-type: Need to clean the stem of the applicator periodically as it tends to build up and gunk along the length.
- Pen type: Needs to be left on it's side or upside down so that the eyeliner actually comes out.
- Pen type: For some brands/formulation, when left upside down, will cause lots of product to leak and form a mess when you try to use it.

Method of Application:
Self explanatory, so... I'm going to skip this.

Brush Equivalents: (See Above)
4. Pointy Liner Brush
5. Angled Liner Brush

DISCLAIMER:
Brush and sponge equivalents listed here are not perfect equivalents. Specific brushes have their benefits over the sponge equivalent, but you can replace them.

Ok. That's the end of it!
I was going to take a picture and add it into this note, but I washed all my brushes this morning and they are drying right now...
So... I guess I'll do it another day.
I don't think I have a felt tip sample though... I threw my eyeliner away a while ago, I'll see what to do later... I guess.

Nights Guys!
Tesun

Tuesday, November 13, 2012

#06 - Brushes vs Sponges Part 2 (Face)


Welcome to the second part of this Brushes vs Sponges Smackdown!
Haha, ok let's be more serious here.

To actually go into detail with all the different types of brushes would make for a VERY long note.
So I'll be sharing my views and opinions of the many many brushes categorized into smaller segments.
Of course, a comparison to the sponge equivalents will be added.
This one is dedicated to FACE brushes and sponges.

This might get a lil messy, but I'll try my best to make it flow.
For reference sake, I will be writing each section according to the BRUSHES, which are numbered, and also list the Sponge equivalents for that brush, which will be lettered.
Confused yet?
Haha, each type of brush or sponge will get a brief description of the tool in question, just so we all can follow what the hell I'm talking about.

Let's get started, first I'm going to list the types of brushes and sponges we will go through in this note.
Just so I don't forget anything later on... I'm really scatterbrained you see...

Brushes:
- Foundation Brush
- Stippling Brush
- Kabuki Brush
- Powder Brush
- Angled Blush Brush
- Blush Brush
** There are many many more, but these are what I'll be focusing on right now.
IF you need help with other kinds of brushes, feel free to drop me a message!

Sponges:
- Disposable Wedges
- Foundation Pad Sponges
- Velour Puffs
** I have no experience with the Beauty Blender, so I'm not going through it.
Please note that these sponges are largely used for Foundation, Powder and perhaps Concealing.  
They are not suitable for blush or contour.


1. Foundation Brush
A foundation brush refers to the brush that has a flat ferule, kinda shaped like a huge flat shader eyeshadow brush.
It is usually fairly densely packed with synthetic bristles, making it good for use with creams and liquid products as it absorbs lesser product.

Pros:
- Good for liquid or cream products
- Large brush head makes application time shorter
- Especially ideal for use with face paints and clown white if you need to cover large areas.
- Fairly easy to use, just like a paintbrush

Cons:
- Not for powder products
- High likely to leave streaks in your foundation, especially if your product is not very pigmented
- Difficult to blend things with

Method of Application:
1. Either pick up product directly onto the brush OR dot product onto face with fingers
2. Start brushing the product on face from the center outwards (i.e: center of forehead to the hairline; nose to the cheeks...etc)
3. Repeat until you like the result.

Sponge Equivalents (See Below)
(a) Disposable Wedges


2. Stippling Brush
A stippling brush typically has 2 layers of bristles, usually shorter black and longer white ones.
Densely packed shorter natural hair bristles, with longer more sparsely distributed synthetic bristles.

Pros:
- Good for liquids and cream products
- Gives an airbrushed look if applied correctly
- Builds up coverage easily

Cons:
- Too sparsely packed for powder products
- Technique is more time consuming

Method of Application:
1. Spot product onto your face OR lightly dip the SYNTHETIC bristles into product
2. DAB the brush lightly all over the face (hence the name, Stippling brush)
3. If there's any area which doesn't seem to blend well enough, lightly swirl the brush over it, but stippling should be the main mode of action

Sponge Equivalents: (See Below)
(a) Disposable Wedges


3. Kabuki Brush
A Kabuki brush is generally an extremely short handled brush, densely packed with short to medium length natural bristles, forming a flat top or domed brush shape.

Pros:
- Ideal for powder products
- Easy to use
- Fairly quick application
- IF used with a good coverage powder fondation (e.g.: MAC Studio Fix Powder Foundation) can give a flawless matte finish

Cons:
- Can look cakey if too much foundation is applied (minimize by using a makeup setting spray!)
- Build up of product may emphasize dry spots and eczema
- Bit difficult to get used to the short handle

Method of Application:
1. Hold the stubby handle of thebrush with ALL 5 fingers
2. Swirl the brush into your powder compact
3. Tap off the excess (if your powder compact gives a lot of fallout, if not... skip)
4. Place the brush on face and swirl the brush over your face to buff the foundation onto your face
5. Repeat to cover all your face.

Sponge Equivalents: (See Below)
(a) Disposable Wedges
(b) Foundation Pads


4. Powder Brush
A powder brush looks like the older brother of a blush brush, usually with a round ferule.
It can be medium to densely packed with medium to long natural bristles.
The powder brush in the image provided looks pretty small compared to the kabuki brush, but compare it to the blush brush!

Pros:
- Good for lightweight powders (e.g.: Loose powders)

Cons:
- Not for liquid or cream products
- Not ideal to apply powder foundation

Method of Application:
1. Tap out loose powder into the cap of the bottle
2. Dip the brush into the cap
3. Lightly press the product onto your face OR brush lightly onto the face (pressing is better though!)
4. Repeat as necessary.
5. Use the brush to brush off the excess powder off your face

Sponge Equivalents: (See Below)
(c) Velour Puffs


5. Angled Blush Brush
An angled blush brush is basically a blush brush where the bristles are arranged into a sloped shape

Pros:
- Good for powder blush, bronzer or contour
- Synthetic bristle brushes can be used with liquid or cream products
- Easy to 'carve' out the contours with the angled brush

Cons:
- None especially?

** The method of application depends on what you are going to use it for...

Sponge Equivalents: (See Below)
-Nil-


6. Blush Brush
An blush brush is a small brush which can have a flat or round ferule, usually not densely packed.

Pros:
- Can apply powder blush, bronzer or contour

- Synthetic bristle brushes can be used with liquid or cream products

Cons:
- Not as easy to use as an angled brush

** The method of application depends on what you are going to use it for...

Sponge Equivalents: (See Below)
-Nil-


(a) Disposable Wedges
Triangular latex sponges.

Pros:
- Most versatile tool, can be used for powder, liquid and cream products
- Soft texture makes it comfortable and easy to blend products

Cons:
- Absorb a lot of product
- Can get costly if you use many pieces, since it is disposable

Tips for application:
1. Moisten the sponge and squeeze out the excess water for ease of blending

Brushes it can replace: (See Above)
1. Foundation Brushes
2. Stippling Brush
3. Kabuki Brush


(b) Foundation Pads
Usually circular or rectangular latex sponges that come with compacts

Pros:
- Good for powder foundation
- Do not need to replace very often (every 3-4 months)

Cons:
- Absorb a lot of product
- Flat shape makes it more difficult to hold than disposable wedge
- Need to wash the sponge at least every 2-3 weeks

Brushes it can replace: (See Above)
3. Kabuki Brush


(c) Velour Puffs
Usually circular sponges, lined with cloth like material, which is fluffy!

Pros:
- Good for lightweight powders

Cons:
- Absorb a lot of product
- Should be washed every 2-3 weeks
- Need gentle care

Brushes it can replace: (See Above)
4. Powder Brush
Velour puffs maybe included in SOME blush products, but they do not really have the ability to help in application


DISCLAIMER:
Brush and sponge equivalents listed here are not perfect equivalents. Specific brushes have their benefits over the sponge equivalent, but you can replace them.

Saturday, November 3, 2012

#05 - Brushes vs Sponges Part 1 (Hygiene)


Hey guys!
A short one this week... A bit swamped with school assignments and getting ready for AFA!

This was originally intended to be a extension of note #01 - Cosmetic Hygiene for brushes, but... well, that would be plain boring...
So, I decided to do a comparison between the use of brushes and sponges.

Ok, so first thing we need to confirm is that there are many types of brushes and many types of sponges.
But the most important thing is to be able to keep the brushes and sponges in good condition and with good hygiene!!
Since I'm quite short on time, this issue will focus on hygiene, a more detailed comparison will be made later in the series!

MAINTAINING THE HYGIENE OF BRUSHES
Brushes go into your product and onto your skin, the bristles trap dust, makeup and bacteria.
Over time, these build up and you may be breeding some very infective microbes in your brushes without knowing!
So what do you need to know?

Spot Cleaning
  • This involves placing a wet wipe (e.g.: baby wipes, or antiseptic wipes) on your palm and swishing your brush bristles against it.
  • If your brush has a flat ferule(e.g.: flat shader brushes, foundation brushes) move your brush in an back and forth motion, perpendicular to the brush
  • If your brush does NOT have a flat ferule, move your brush in circular motions.
  • Repeat until no more color is removed from the brush
  • ** This should be done before and after you reuse the brush.
Deep Cleaning
There are 2 kinds of brush cleaners: Alcohol based and Soap based
A deep cleaning should be done every 1-2 weeks, depending on how much you use your brushes.
This is because of the very dusty air in Singapore.

Alcohol based Brush Cleaner
  • Alcohol based brush cleaners can help dissolve hardened gel eyeliners among other things, BUT are very damaging to natural hair bristles.
  • For alcohol based brush cleaners, dip the bristles into a dish (ceramic OR metal only) with the brush cleaner, swirl the brush inside a couple of times, then similar to spot cleaning, rub the bristles back and forth or in circular motions on a DRY towel or kitchen paper. Repeat till clean.
  • Alcohol brush cleaner that I use on event days, so I can do makeup for many people with clean brushes, is bought from Cosmoprof Academy at POMO.
Soap based Brush Cleaner
  • Soap based brush cleaners are more commonly used, BUT take a longer time to dry.
  • For soap based brush cleaners, dip the brush into a dish with the brush cleaner diluted with a little water, then rub the bristles against your palm to lather it up. Rinse off the soap and press dry with a towel. Leave the brush to AIR-DRY lying on it's side.
  • I use the sponge cleaner from Daiso as the soap in my homemade soap based brush cleaner mixture.
  • Alternatively, you can use dishwashing soap.

MAINTAINING HYGIENE OF SPONGES
Similar to brushes, sponges build up a lot of junk, even more so because sponges absorb more oil than brushes.
There are many kinds of sponges.
Disposable ones (e.g: triangular makeup wedges), ones included in powder compacts, eyeshadow applicators... etc
They all have different uses, and can be used for different amounts of time

Disposable Sponges
Well, as the name suggests, these sponges are designed to be used once and thrown away.
For that reason, hygiene is not a question for them.

Powder Compact Sponges
In this section I refer to the circular or rectangular latex sponges used in compacts (e.g.: pressed powders, powder foundation... etc) as well as the velour puffs, fluffy type sponge, used in mineral foundations, loose powders... etc
  • Both types of sponges are cleaned in the same way, but the velour puffs are more delicate and should be handled more gently.
  • Use a soap based cleaner. I use the sponge cleaner from Daiso or handwashing soap.
  • Dampen the sponges, drip 3-4 drops of sponge cleaner or handwashing soap onto it.
  • Massage and squeeze the sponge until it lathers.
  • Rinse and repeat if necessary.
  • Squeeze the excess water out and lay out on a towel to air dry.
  • * This should be done at least every month.
Note:
- Latex sponges are not designed to last very long, tears and rips may form and make it difficult to use.
- Change your compact sponge every 3-4 months.

Eyeshadow applicators
These are troublesome little buggers.
I really hate them...
Not only because they pick up too much color but also because when you try to wash them, they fall apart so easily!!

I would recommend tossing them out, and getting eyeshadow brushes... OTL

However... you can 'clean' them, well, sort of...
This method will not remove bacteria and junk, BUT it will help take off excess color so that you don't get a muddy color when applying a different color...
  • Take a wet wipe (e.g.: baby wipe, antiseptic wipe) lay it on your palm.
  • LIGHTLY run the applicator over the wipe.
  • Repeat until no more color comes off.
I'll write more next time... I swear
Tesun

Wednesday, October 31, 2012

Halloween 2012!

This year I had the opportunity AND time to actually do something for Halloween.
Had planned on being a Shinigami for a while, borrowed a cloak and did my best with the makeup!

Went down to Clarke Quay on Saturday with some friends.
I totally didn't expect there to be festivities there.
Streets were filled with people, some had gruesome rotting flesh, some just put on a mask... etc

Cosplayers were there too.
SHAME ON YOU
Halloween is to SCARE people... trust me, Naruto and Ichimaru Gin ain't scaring no one.

Best part was while walking on the crowded street, I turned around to look for my friends (slow pokes!) and scared the crap out of the person behind me.
Ok, so she didn't take a dump, but she sure as hell jumped pretty high.

^^ some dude in a demon skull doggy costume was kind enough to take pics with me.
Absolutely <3<3 his mask.
The mouth part opens and closes!!!

On actual Halloween, i.e.: today, I went to school in almost the same costume.
Ok, I swapped the black dress for black shirt and charcoal grey pants (><" no black pants anymore...)
and I freehand drew the makeup without references....
So yeah... I managed to cut down the makeup time by 40mins, of course, the makeup wasn't exactly the same either.


All in all, Halloween was a blast!
AND my 1st attempt at using Mehron Clown White was pretty good!
I kept thinking... "ehhh not even le", "why still like orange-ish" until I realised my room light was orange... OTL

I sacrificed quite a bit of gel eyeliner for this, but oh well... makeup can't last forever...
When I first bought the pot I was wondering how on earth I could finish it... cos I would want to try OTHER types/brands

Tis was very fun!!!
But alas... my first Halloween might really be my last...
there's no way a Hospital would let me dress up and scare patients.... OTL

Tesun

Sunday, October 28, 2012

Anime Festival Asia 2012

^^
AFA is just around the corner!!

Was originally intending to sit out of the makeup business for THIS event...
BUT... people kept asking me about it...
sooo.... there's... conditions regarding makeup service this time around...


Currently slots taken are....

10 Nov 2012 (Sat):
7.00am - Sayuri
8.00am - Wisteria
9.00am - Desti

11 Nov 2012 (Sun):
8.00am - Wisteria
9.00am - Desti

Tuesday, October 23, 2012

SasakiAsahi

Completely ♥ Asahi's videos.

This video is comprehensive of many good basics AND it's hilarious
BUT ignore the parts regarding dry weather, because Sg has only 2 kinds of weather. Wet and wetter.

Also, note that she's an ambassador of Relvon.


The video is just awesome.
It combines a lot of basics which I have yet to go through.
Her definition of cream vs liquid is a bit different from mine (mine is that creams contain more oils in the form of wax), but fundamentally, the basics are well covered!

Saturday, October 20, 2012

#04 - Color Correcting


Quite the odd topic this time around.
Color correcting isn't necessary for basic makeup, but... there are many misconceptions about it.
So this short note is to rectify those misconceptions.

Firstly, let's go through what color correctors are.
  • Color correctors are usually cream products
  • Exceptions are moisturizers and makeup bases which have color tints
  • Come in a variety of colors, for various uses (see below for more information!)
  • MUST be matte. If there is shimmer in it, you can't use it as a color corrector

Next, let me list the misconceptions that I have heard before:
  • Color correctors are concealers
  • Color correctors will erase my pimples / dark eye circles
  • Color correctors can help reduce pimples / dark eye circles

So let's correct those misconceptions.

1. Color correctors are concealers
Color correctors are not concealers.
You will DEFINITELY need to use either your foundation (medium to full coverage) or a concealer the SAME shade as your foundation over it.

Color correctors are used to neutralize your 'discolorations'.
This means that they will hide the red or bluish tint from your pimples or dark eye circles and scars
Of course, you must use the correct color of the color corrector for each type.

How to choose what color of color corrector to use:
1. First look that the area (pimple, scar or dark eye circle) and determine what color undertone it has.
       - Generally, pimples have a red undertone, dark circles have a blue undertone, but scars can have various undertones.
2. Choose color based on the guide below
       - Red undertone      --> Green color corrector
       - Blue undertone      --> Orange / yellow color corrector (orange is the BEST though)
       - Yellow undertone   --> Purple color corrector
     *** Basically, google "color wheel" and look for the color that is OPPOSITE the color undertone that you've identified.


2. Color correctors will erase my pimples / dark eye circles
This one usually means that you can't see the pimples or dark eye circles after makeup is complete...
This is obviously not true.
As above, they only act to neutralize discolorations.
IF you were to use them without foundation or concealer, you would definitely end up with a patch of whitish-green or orange around the area.

Furthermore, they are NOT magical wonderous creations able of masking contours.
Pimples are usually raised and WILL cast a shadow.
While, dark eye circles CAN be puffy and can also cast a shadow.
These shadows will still be there.
Of course, there is a method of using concealer to help mask these, but it's a pain in the ass to explain in words.


3. Color correctors can help reduce pimples / dark eye circles
This one...
All I can really say is... there is no scientific evidence that any color correcting product can do such things.
Of course, maybe some product may contain some naturally derived compounds capable of such actions, and I have no intention to test a gazillion products to let you know about them...

But, just saying, I'm an advocate of using Tea Tree Oil (Melaleuca Oil) for treatment of wounds and pimples.
Tea Tree Oil has antibacterial effects.
It smells like shit and the fumes sting my eyes sometimes, but things heal faster with it for me.
So... maybe you can try using that instead of relying on... dubious claim / misconception of color correctors.

Regarding eyes...
Well, not really for dark eye circles, but... for puffy eyes though...
Put a spoon into the fridge for at least 30 minutes (not the freezer please!)
Then gently press on your eye.
I've tested it out ONCE. I didn't like the cold sensation on my eye... People who know me personally would know I hate the cold...

Alternatives you can try is to use a mixture of Tea Tree Oil AND Rose Oil and rub it all over your face (avoid your eyes!)
I've done this quite a few times, it's really oily... seriously, but it's good.
You get the antibacterial effect of the tea tree oil, but it's not so concentrated to make your eyes water.
AND you get good moisturizing effect of the the Rose Oil.
If only rose oil weren't half as expensive as it is....
*Of course, only do this at night...

Hope this makes sense and helps some people
Tesun

Monday, October 15, 2012

#03 - Concealers


The third piece!
Haha... I just noticed that I start writing for this series whenever I feel stressed... OTL

Ok, today's topic is concealers.
First, we will go through what to look for in a concealer.
Then, the various types of concealers based on formulation (e.g.: Powder, Liquid, Cream).
And finally, we will look at techniques to apply them and their pros and cons.

The ideal concealer for you, should:
  1. Be suitable for your skin type (e.g.: dry, combination, or oily skin)
  2. Have the SAME skin tone as your foundation, ideally... OR
  3. Be 1-2 shades lighter than your natural skin tone. (Note that most brands have very limited colors available and each skip at least 3-4 shades in between them)
  4. Should be easy to apply, especially in a rush
  5. Should be easy to keep hygienic (See #01 - Cosmetic Hygiene)


Types of Concealers:

1. Mineral and/or Powder concealers
Yes, there are powder concealers.
No, I have not personally tested any of them before... so basically, take what I say with about them with a pinch of salt.
Most of what I write here is based on what I've read and what I've heard from friends who have used them before.

Pros:
- Good for oily skin (Being powder and mineral based, they tend to absorb more oils)
- Lightweight (Generally, powder based formulations are not as thick and heavy as cream or liquids)

Cons:
- Messy to apply
- Not for dry skin
- Coverage tends to be from sheer to medium
- Can look cakey if trying to build up coverage
- Requires applicator brush for application (Often the brush is installed onto the bottle, making it difficult to wash the brush)


2. Liquid concealers (e.g.: ZA Concealer perfection)
The most commonly used form of concealers.

Pros:
- Good for dry to combination skin. (Ironically, most cream concealers have too high wax content and are drying on the skin)
- Coverage is medium to full. Able to build up (For most formulations)
- Application can be done with fingers, no additional tools required
- Small bottle is convenient for travel
- Can mix colors easily (If bought wrong shade)

Cons:
- Can be messy to dispense product.
- May 'slip' or 'slide' into creases of the face (Set all liquid and cream makeup with a powder to reduce this effect!)


3. Cream or Stick concealers (e.g.: Canmake Color Stick, Mehron Tattoo CoveRing)
Creams generally have higher wax content then liquid concealers.
This is to allow them to stay on the skin longer.

Pros:
- Good for combination skin (Dry skin people can try it, but are better off with a liquid concealer)
- Wide range of coverage, from sheer to medium, but not quite yet full coverage.
- Application can be done with fingers, no additional tools required (Actually, you are better off using your fingers)
- Stick concealers are generally convenient for travel

Cons:
- Not for oily skin
- Can become cakey when built up (Higher wax content makes it drying)
- Limited color shades available usually
- Tendency to crease in lines of the face
- Hard to keep hygienic (Usual method of application involves dipping of fingers into the product)


Application Techniques
Application technique used depends on the type of concealer you are using.

1. Using Fingers
Most common method used and actually the most versatile.

Pros:
- Good for liquid and cream concealers
- Warmth from fingers blends in concealer better (esp for cream concealers)
- No additional tools required, good for on the go application

Cons:
- Not for mineral or powder based concealers
- Hygiene issue
- Result highly dependent on how the concealer is applied (see below for advice)

How to apply:
- Dispense liquid concealer onto finger OR
- Rub the stick/cream concealer to warm up the waxy concealer and transfer onto finger
- Spot on areas requiring coverage
- Use finger to dab on and around the area lightly to blend out the concealer (DO NOT RUB)
- Set with powder product for longer wear.


2. Using Brush
There are many many concealer brushes out there, but really, you don't need a specific brush for concealer.
You can use a normal eyeshadow brush as well.
For best results, try using a synthetic bristle brush for liquid or cream concealers and a natural bristle brush for powder and mineral concealer.

Pros:
- Good for all types of concealer
- Hygiene is better than fingers

Cons:
- Hygiene issue when re-dipping brush for more concealer
- Tendency to apply too much product making it cakey or hard to blend.
- Not a ideal method for traveling

How to apply: (Liquid and cream concealers)
- Dispense liquid concealer or rub some cream concealer onto brush
- Spot on areas which require coverage
- Gently blend out the concealer using short outward strokes (from the center of the concealer outwards)
- Set with powder product for longer wear
** Achieve better results by using fingers to blend out!

How to apply: (Mineral and powder concealers)
- Dispense product into CAP of the bottle
- Swirl your brush into the powder, tap off excess
- Lightly brush onto areas requiring coverage, tap product onto area if you need more coverage
- Use the brush with light strokes around the area with concealer to blend it out.


3. Using Sponge
Sponge here can refer to the triangular sponges, beauty blender... etc

Pros:
- Good for liquid and cream concealers
- More natural than brush application
- Hygiene issue is easily solved by using disposable sponges

Cons:
- Not for powder and mineral concealers (Sponge tends to absorb a lot of the product)
- Not ideal for traveling (Sponges take up a lot of space)
- Sponge tends to absorb product, will use up product faster

How to apply:
- Before using the sponge, dampen it with water (squeeze out the excess) for a more natural finish
- Pick up product with the sponge and spot onto the face
- Lightly dab on the areas with concealer to blend it out (dabbing from center outwards is more appropriate)
- Reapply concealer to areas if necessary.
- Set with powder product for longer wear.
** For accuracy, best to spot product onto the face using fingers or brush, but achievable with sponge

Ok, I guess that's about it.
^^

Tesun

Friday, October 5, 2012

Prepping your Skin


The second installment to this series... Prepping your skin for makeup.

Let's face it people, the air in Singapore... has NEVER been 'clean'. After a heavy rain, well, it MIGHT smell fresh-er, but...
Hey, if you don't sweep the floor for 3 days, be prepared to find dust bunnies romping around your room.
Guess what... those dust bunnies... came from the 'clean/fresh air'.

I started putting on makeup to University 2 years ago.
My excuses were that (a) I'd get to practice and (b) it's a barrier from the gross stuff floating in the air.
It was one of the things I actually managed to make a part of my routine.
Well, it lasted about a year only though... I got too lazy.

Anyway, point is, while makeup acts as a barrier, you've gotta make sure that
  • Your face is clean (Sealing in germs ain't useful in any manner)
  • You aren't going to break out because of your makeup.

There's various reasons for breaking out due to your makeup.
  1. Your skin gets too dry (This is worse when you are in air-conditioned areas)
  2. The makeup contains something you are sensitive to
  3. The makeup clogs up your pores
and the list goes on.

Prepping your skin for makeup helps with (1) and to some extent (2) and (3).

So, let's begin.

Wash your Face
Basic personal hygiene and the reason I prefer to do my makeup at home rather than on location.
Because... who wants to bring a bottle of face wash and a mini towel out?!

Many times when I'm booked to do makeup for people, they come in a rush and... unfortunately, sweat (perspire is the right word) a lot.
Worse is when the client completely doesn't understand the need to wash his/her face daily.

Despite being on location, I can't very well tell them to go buy a bottle of face wash from 7-Eleven.
So the next best alternative... is to offer them a wet tissue.


Apply Moisturizer
People who suffer from dry skin or eczema would understand the need to apply moisturizer.
However, often people who have 'oily' or 'combination' skin would look at you bizarrely when you suggest them to.
It's not strange though. After all, who would want to make their skin 'oilier'?

But there is a misconception, there are 2 kinds of moisturizers.
  1. Creams (These contain more oil)
  2. Gels (These contain less oil)
People with dry skin should make use of creams and people with oily skin should make use of gels.
Going completely without moisturizer, causes the skin to be stripped of it's natural oils after washing your face.
In response, it will produce MORE oils, because it thinks the current amount is insufficient.

For people on a tight budget or have sensitive skin, I would recommend Aqueous Cream from any Pharmacy (E.g.: Watsons, Guardian).
It's cheap and doesn't contain added fragrances which may irritate sensitive skin


Apply Sunscreen
Generally, it is advisable to wait 15 minutes for the moisturizer to be absorbed before putting on other products.
But, realistically... who the hell is going to wait 15 minutes?!

Cosplayers... please realize that... IF you insist on going out (to school, to open air events) without sunscreen, then basically, expect to be tan.
Don't cry and make a fuss when you don't have a snow white complexion.

Sunscreen is not a miracle in a bottle.
You have to apply it religiously, and of course, not only to your face.

I have a confession to make. I don't. I just apply it to my face.
But. I generally wear long sleeves and long pants because it's a freezer box in school. (my friends beg to differ most of the time)

Some facts about sunscreen
  1. No sunscreen is waterproof. If they say it is...they're lying. Reapply after swimming or showering.
  2. Sunscreen wear time is roughly 2-3 hours. You should reapply it throughout the day. I don't.
  3. Sunblock is no longer a recognized term because it is inaccurate. It doesn't block the UV rays at all.
  4. There are 2 types of sunscreen. Physical 'blockers' and Chemical 'blockers'.
Point is. Wear sunscreen.
If you want to be pale skinned, wear sunscreen, bring sunscreen out with you and reapply every 3 hours.
Otherwise, just apply it as and when it is convenient to.

I have not tried many sunscreens and what I look for in a sunscreen may be different from you, but... these are my recommendations:
  • Neutrogena Ultra Sheer Dry Touch Sunscreen (SPF 100+)
  • Loreal UV Perfect (SPF 50)
The Neutrogena one is a large bottle, can be used for face AND body and does not leave a sticky or oily feeling after application.
The Loreal one is a small bottle. Well, you can apply it to the face and body, but... you probably will have to stock up on it. It leaves a slightly oily feeling after application.


The previous 3 steps are the BASIC skin prep. You can stop here if you want.
After applying the sunscreen, wait 15 minutes then take a tissue and gently press over your face, IF you want your makeup to stay on even longer.


Apply Primer
Primers have many functions, they absorb oily secretions from your face as well as help to smooth out your skin to allow you to apply makeup more easily.
There is no real need to get a separate primer for your eyes, though the Urban Decay Primer Potion (UDPP) and the Too Faced Shadow Insurance are cult favorites with Beauty gurus.

Use about a 1 to 1.5cm long strip of primer for the WHOLE face and gently rub the residue onto your eyes.
Don't worry, it WILL cover the whole face.
If you think it's too much, you can use less the next time, play around with the amount.

For face primer, I have only tried out ONE product. It does a good job and I have yet to finish up the bottle because I don't use it that often.
NYX Studio Perfect Photo-Loving Primer comes in clear, green and purple.
I use the clear one, but the green and purple do not leave any weird tinge on the skin, if you are wondering.
They can be used as a overall color corrector.
Green can be used if you feel that your face is largely reddish or if you flush very easily.
Purple is supposed to 'brighten' up your skin, but frankly, I have reservations about it.

That's all folks!
Look forward to the next installment!
-Even I don't know what the hell it'll be about!! Got any suggestions?-

Tesun

Sunday, September 30, 2012

Cosmetic Hygiene


This is the first in a series of notes to help people with their makeup skills.
I chose to start with 'sanitizing' as a topic as it is often overlooked and unfortunately, is often neglected in the cosplay community.

First of all, let us understand the need to practice good hygiene with makeup.
  1. The human skin naturally has millions of bacteria living on it, everyone has different composition of types of bacteria.
  2. Most of these bacteria are not able to 'infect' you, when you are healthy, but note that Staphylococcus aureus is one of these bacteria... And MRSA is a type of Staphylococcus aureus that is highly resistant to antibiotics.
  3. Some people are more susceptible to certain types of bacteria than others, so transferring these bacteria by accident may cause infection.
  4. Other than safety issues, good hygiene can also prolong the lifespan of your makeup.

** Note that the following recommendations do NOT:
  1. Eradicate all bacteria, fungi or whatever that is growing on your makeup.
  2. IF you have liquid or cream makeup which is already opened and contaminated, the following will not be able to extend the life of your makeup
  3. Prevent contamination from the start. The second you open the bottle, bacteria in the air will settle on the product. The recommendations only help to reduce the amount of bacteria accumulating.

Some basic facts about makeup:
  1. Cream products generally have a shelf life of 1 year at most.
  2. Liquid products depend on what product they are, check the label on the bottle with a symbol that looks like a container and has a number with 'M' denoting number of months the product should be kept.
  3. Powder products can have a shelf life of 2-3 years.
  4. Powder products which are pressed into a pan, are easier to keep disinfected, product under the top layer is more likely to be clean.
  5. Powder products which are loose powders (e.g.: eyeshadow pigment, loose powders with sifters) are easily contaminated as the contaminated powder mixes with the bulk product.
  6. Best type of alcohol to disinfect products with is NOT 100% alcohol, you require water for disinfection.
  7. The most commonly found strength of alcohol found in Singapore is 70% isopropyl alcohol.
  8. If your product ever smells wonky, just chuck it because it's not worth getting an infection over.

Ok, now that we've cleared those out of the way...
Let's talk about disinfecting and maintaining hygiene of products based on their composition (eg: powders, liquids, creams)

For powders there are generally 2 types of powder products.
The pressed powders and the loose powders. Both have different ways of maintaining the hygiene of the items.

Pressed Powders (E.g.: Powder foundations in compacts,  Eyeshadow pans, pressed blush)
Powder products like these have the LONGEST shelf life.
Powder products are dry and bacteria require moisture and oils to grow, and they can only get moisture (from air) and oils (transferred from the skin) on the top layer of the powder product.
For this reason, the product under the top layer can be presumed to be free of bacteria, assuming that no bacteria was introduced during manufacturing of the product.

To maintain the hygiene of these products, you will require a spray bottle (available at SASA), at least 70% isopropyl alcohol (available at Watsons, Guardian, Unity...), Wet wipes or alcohol swabs, Tissue paper.
  1. Use the wet wipe or alcohol swab to clean the container. Fallout from the powder product can collect on the mirror or the sides of the pan, these can attract bacteria.
  2. Using the alcohol spray, spritz the surface of the powder product. Let air dry.
  3. IF there are spots where the powder has glazed over and is hard (due to absorption of oils that was transferred), use the tissue paper to remove those spots. At worst, you will have to use your fingernail to scratch it off. These spots will not yield any product and will just prevent you from accessing product below.
  4. Spritz with alcohol again and air dry.
  5. Close the cover
*** You can do this every few weeks. There is no need to do this often unless you are sharing the product among friends, if so, disinfect every use.

Loose Powders (e.g.: Eyeshadow pigments, Loose powders with sifters, mineral powder foundations)
Similarly to pressed powders, loose powders is not the ideal environment for bacteria to grow.
However, loose powders have a tendency to trap air and absorb moisture from the air and are more likely to grow bacteria than pressed powders.

To maintain the hygiene of these products, you will need alcohol spray or alcohol swabs and something to scoop product with.
Here's how to use the product and maintain good hygiene.
  1. Products with sifters: Open the cap and tap powder product into the cap. Dip your brush into the cap, not into the sifter.Products without sifters: Open the cap, either tap out or scoop out product with a disinfected spatula (use the alcohol swab) into the cap. Dip into the cap
  2. After applying the product, throw away the excess. It is considered contaminated.
  3. Spritz the cap with alcohol OR wipe the cap with the alcohol swab. Let air dry.
  4. Cap the product.
*** This is to be done every time you use the product.

Liquid Products (e.g.: Liquid foundation, liquid concealers)
This section does not apply to liquid eyeliners, mascaras or lipgloss.
Liquid products contain both moisture and oils, they are good environments for bacteria to grow in.
Once contaminated, the liquid product cannot be 'sanitized'.
You need to watch for hygiene from the start.

To maintain the hygiene of these products, you will need alcohol swabs and something to scoop out the product if necessary.
1. Bottles with pumps: 
     - Dispense the product on the back of your clean hand or on a disinfected palette (use the alcohol swab). 
     - Wipe the pump nozzle clean of any product with the alcohol swab.
     - Cap the product.
2. Bottles which can be squeezed: 
     - Squeeze out product onto the back of your clean hand or on a disinfected palette. 
     - Wipe the tip of the nozzle clean of any product with the alcohol swab. 
     - Cap the product without letting air enter the bottle. Air is a source of bacteria.
3. Bottles without pumps and cannot be squeezed (e.g.: Revlon Colorstay Liquid foundation) 
     - Pour out the product. If this causes too much wastage (pouring too much out because it is too viscous), use the disinfected spatula to remove product. 
     - Wipe the mouth of the bottle with an alcohol swab.
     - Cap the bottle.
*** This is to be done every time you use the product

Liquid Eyeliner
There are two types of packaging for liquid eyeliners.
1. The bottle that comes with an applicator to be dipped into it. (e.g.: Silkygirl Precision Liquid Eyeliner)
2. The pen type with a felt tip or brush tip. (e.g: K-palette 24 hour Real Lasting Eyeliner)

It is not possible to maintain hygiene for pen type liquid eyeliners, but you can do it for bottle type.

Frankly, these are too much of a pain in the ass to keep hygienic.
And I recommend that no one should share liquid eyeliners as no one would like an eye infection.
Liquid eyeliners should be kept a maximum of 4 months.

To maintain the hygiene of bottle type liquid eyeliners, you will need alcohol swabs.
1. Open the product and use the eyeliner.
2. Before you re-dip the applicator to get more product to finish your eyeliner, wipe the entire applicator with the alcohol swab.
3. Dip the now disinfected applicator into the bottle, and continue to draw your eyeliner
4. Repeat step 2-3 as many times as required to finish your eyeliner or tattoo or whatever.
5. Wipe the applicator again with alcohol swab and close the bottle 

*** Note that you will probably use 3-4 alcohol swabs, and this is to be done every time you use the product.


Mascara and Lipgloss
Many people do not realise it, but mascara is considered a liquid product.
Mascara generally has a shelf life of 3 months from opening.

Similarly to hygiene for bottle type liquid eyeliners, keeping mascara / lipgloss hygienic is a pain in the ass.
However, if you do this religiously, you can extend the shelf life of a mascara to 6 months.
To maintain the hygiene of these products, you will need alcohol swabs.
  1. Open the mascara and use the product on the wand.
  2. Before you re-dip the wand into the bottle for more mascara, wipe the entire applicator with an alcohol swab. From tip to butt of the cap.
  3. Insert the disinfected wand gently into the bottle and twist to pick up more mascara. Do not pump the wand up and down, to prevent introduction of air and bacteria. Proceed to apply your mascara.
  4. Repeat steps 2-3 as many times as required to get your desired effect.
  5. Wipe the applicator again with alcohol swab and gently insert the applicator and close the bottle.
*** This is to be done every time you use the product.

Cream products (e.g.: Gel Eyeliner, Stick concealers, Maybelline Jelly blush, Lipstick)
Cream products generally have higher oil content than liquid products, usually more waxy oils to make them more solid in nature.
Cream products are also the ideal environment for growth of bacteria.

To maintain the hygiene of these products, you will need alcohol spray or a container to hold alcohol, something to scoop out product and tissue paper.
1. Lipsticks: 
     - Twist up the lipstick. 
     - Wipe the top layer of the lipstick off with a tissue (the parts which have been contaminated by use) 
     - Dip the lipstick bullet into the container holding alcohol. (I find the cap for the spray bottle to be a good container)
*** This can be done every few weeks for a personal lipstick.
2. All cream products including lipsticks: 
     - Use the disinfected spatula to remove product, cap the product.
     - Dip your brush into the product on the spatula and apply it.
     - Discard all excess product that was scooped out.
     - Every few weeks, wipe with a tissue and spritz the surface of the cream product with alcohol and allow to air dry.
*** This is to be done every time you use the product and is highly recommended if you are sharing the product.

That's all folks!
I hope that this was helpful to everyone.
Thanks for reading~

Tesun

Thursday, August 23, 2012

KR Artistry is coming to ICDS!

Hey guys!

In actuality, this has been in the motion for a month, despite the short notice using this poster.
But... who cares?!
haha.

ICDS is a couple of days away and Kouzuke Ran Artistry will be having a booth to do makeup on-the-spot!!
Need some help with eyelining, eyeshadow or some (do-able) hand-drawn tattoos??
Come on down and enquire regarding pricing and feasibility!!
I'll try my best to satisfy your needs!!

Well, if anything, come down and chat with me, and exchange coscards!
I hope my booth wouldn't be the sad lil one with nobody patronizing... hehe

Monday, June 18, 2012

Portfolio

Hey guys, in case you haven't read the FAQ, this is a disclaimer.
I declare that I am self-taught and do NOT hold a degree or diploma in cosmetology.

Please take your time to peruse my humble portfolio of past works.
All credits should have been edited onto the photographs.
Permission from all parties (Model/Cosplayer, Photographer, Editor) have been obtained prior to uploading. 

Please CLICK on the thumbnails to zoom in


-SPECIAL EFFECTS MAKEUP-
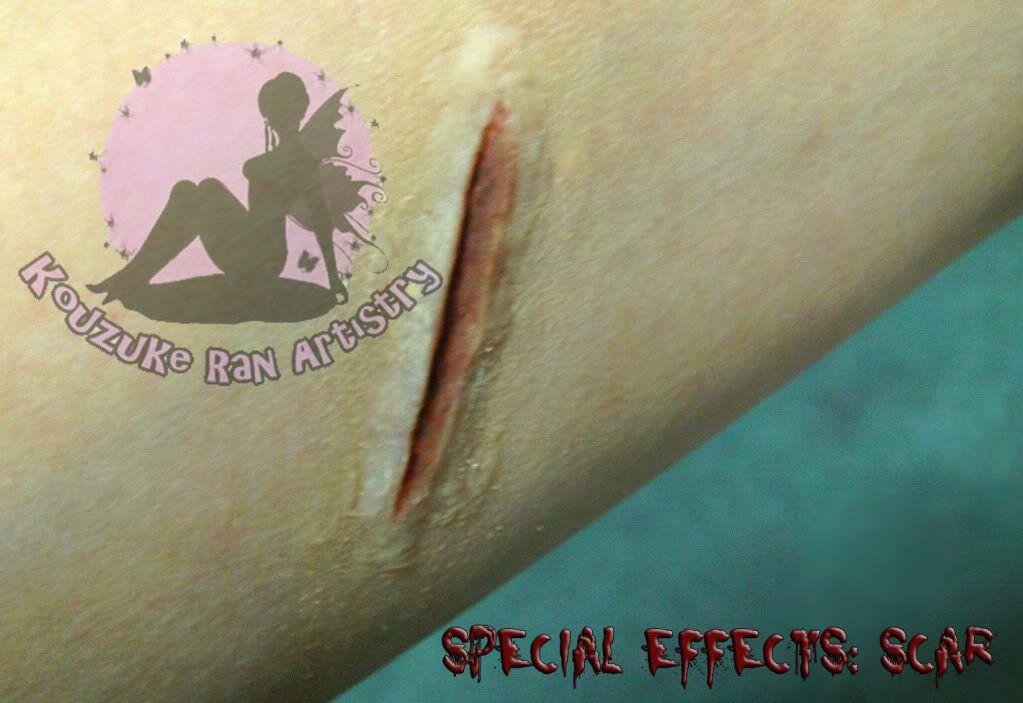
Scar
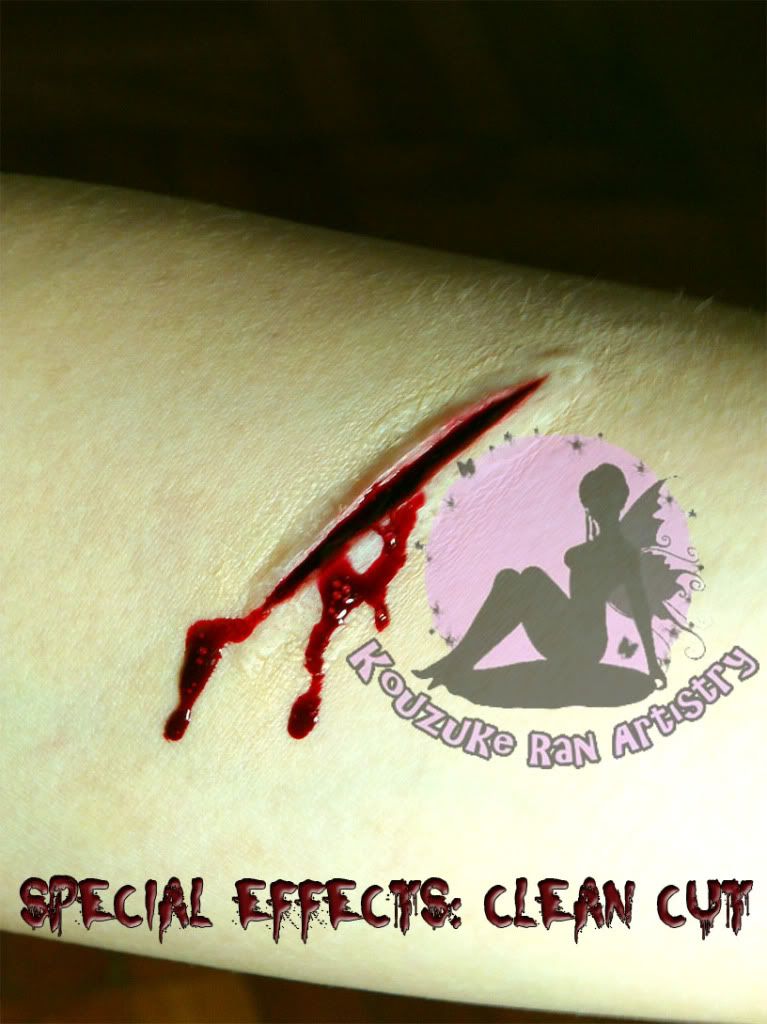
Clean Cut
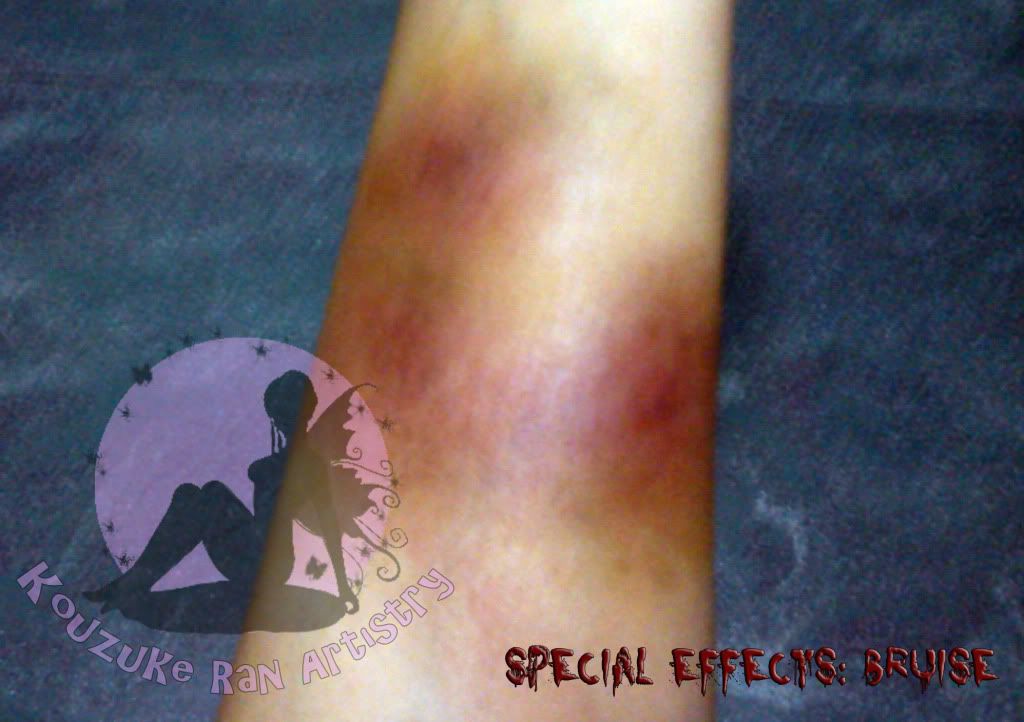
Bruise
Owwie
3D Scar
Owwie
Clean Cut
Owwie
Bruise
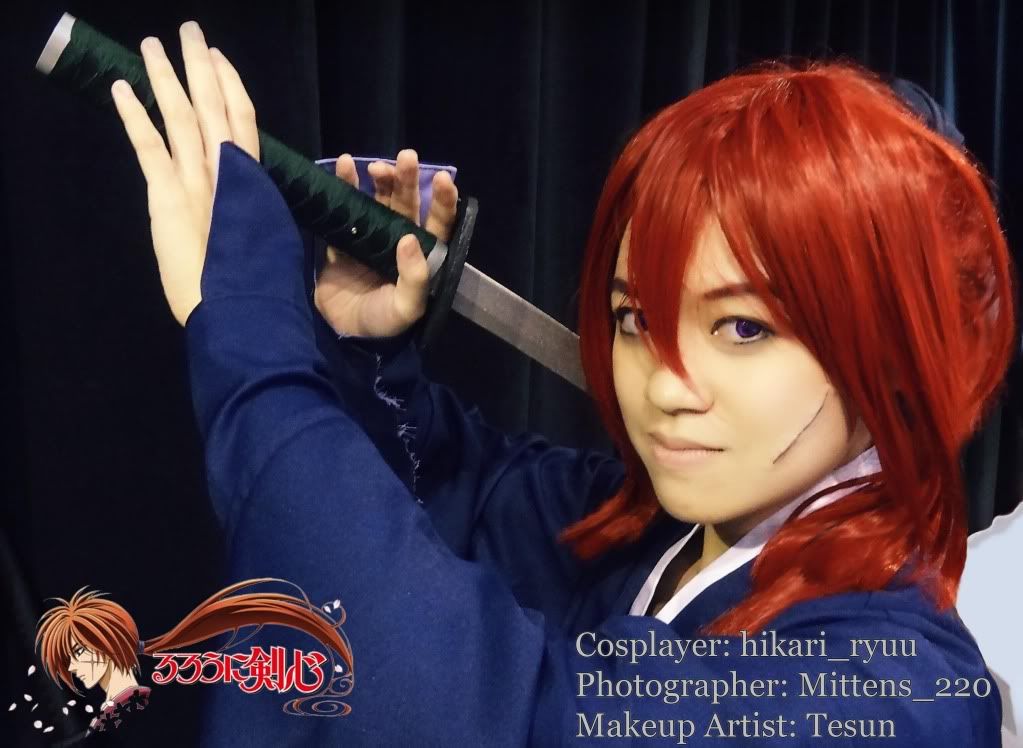
Hongo Mio
Himura Kenshin
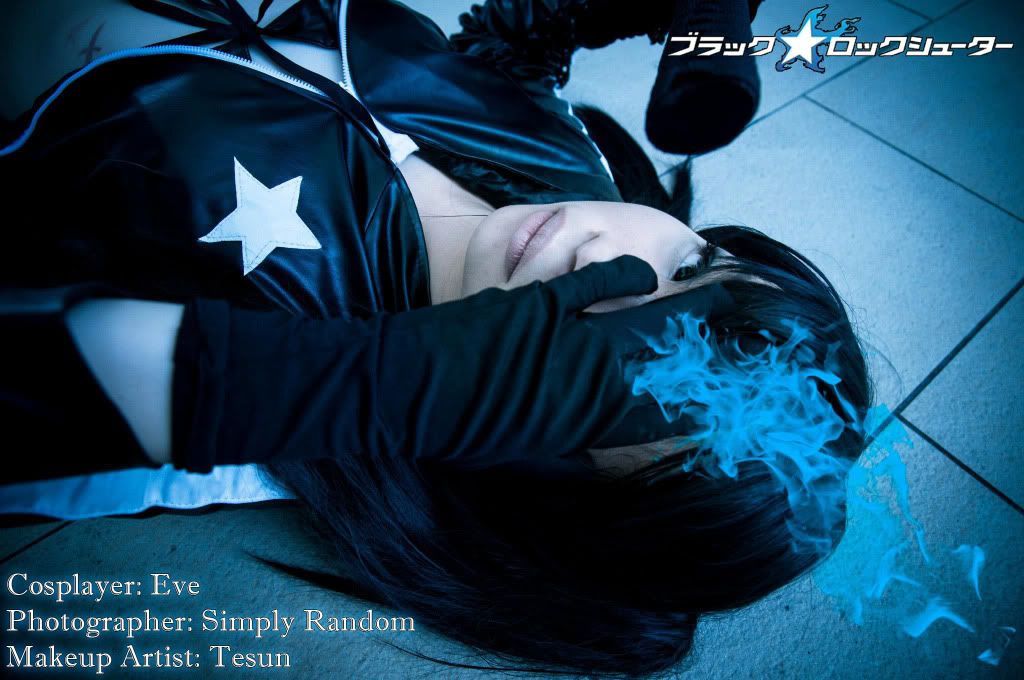
Black Rock Shooter
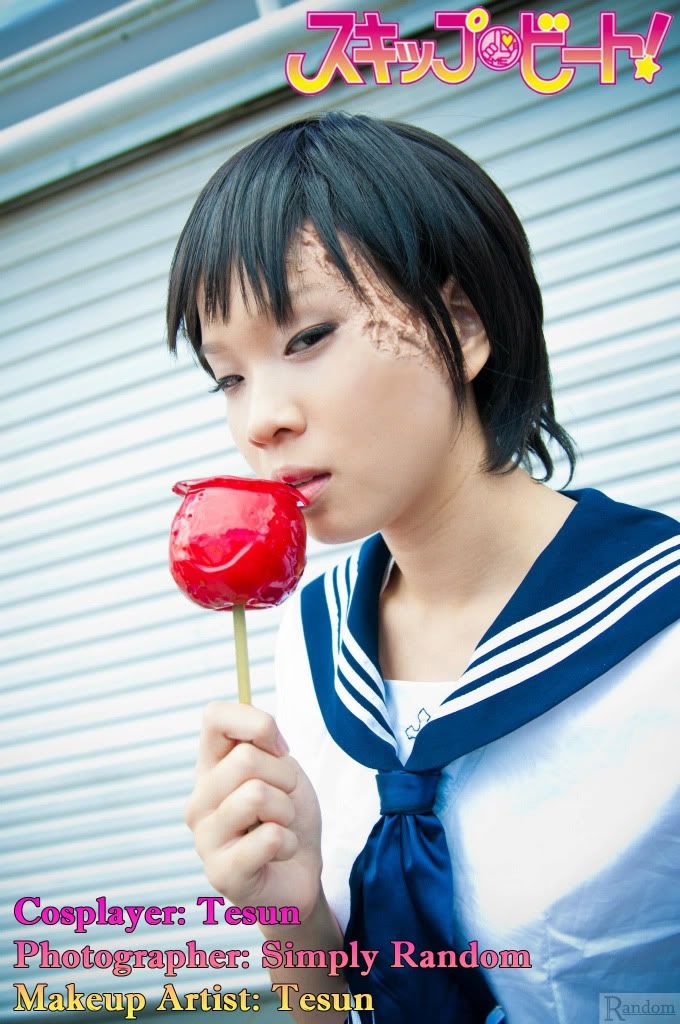
Skip Beat: Hongo Mio
3D: Raised Scar
Rurouni Kenshin: Himura Kenshin
3D: Scar
Black Rock Shooter
2D: Abdominal Scars
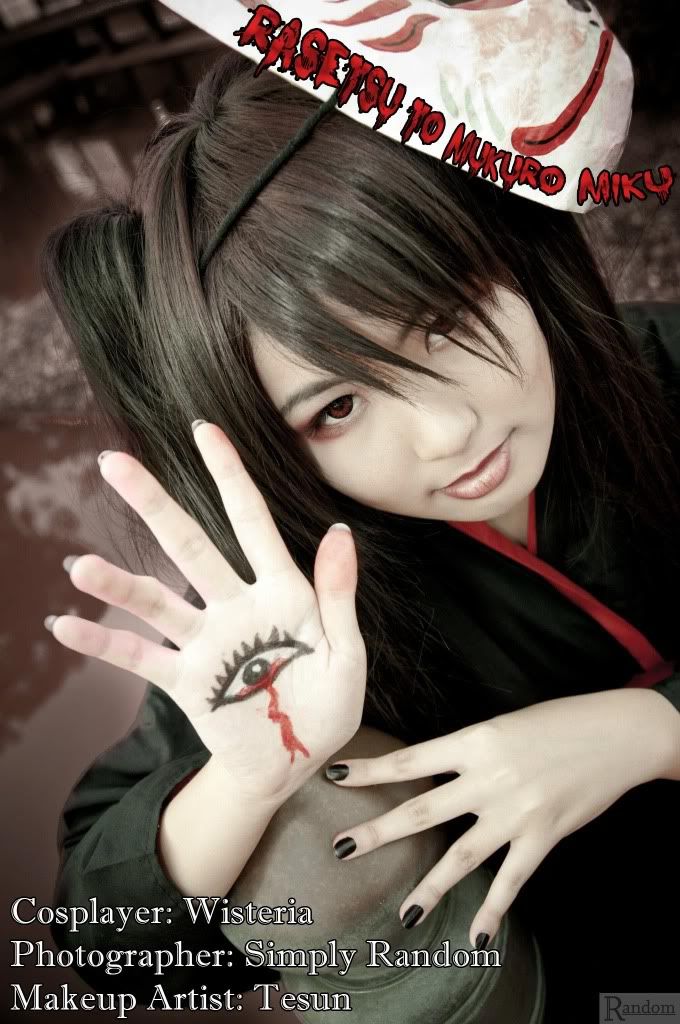
RasetsutoMukuroMiku
Rasetsu to Mukuro: Miku
2D: Eye with Blood


-OTHER STYLES-
Riko Aida
Kaito
Bruise
Kuroko no Basuke: Riko Aida
Natural
Drawn on fake double eyelid
Romeo & Cinderella: Kaito
Natural
F to M crossplay
Candid Shot
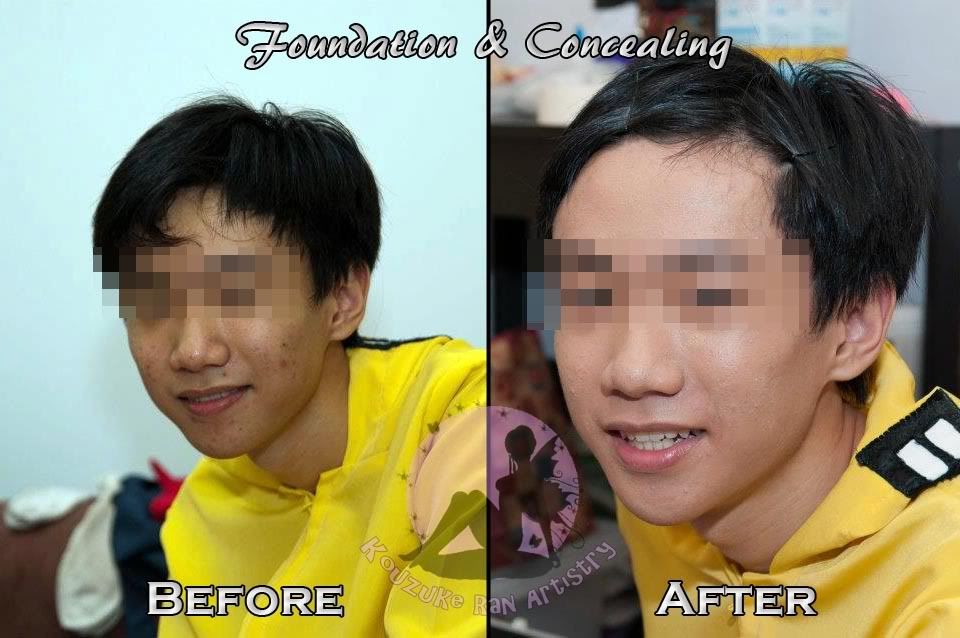
Foundation
Before & After
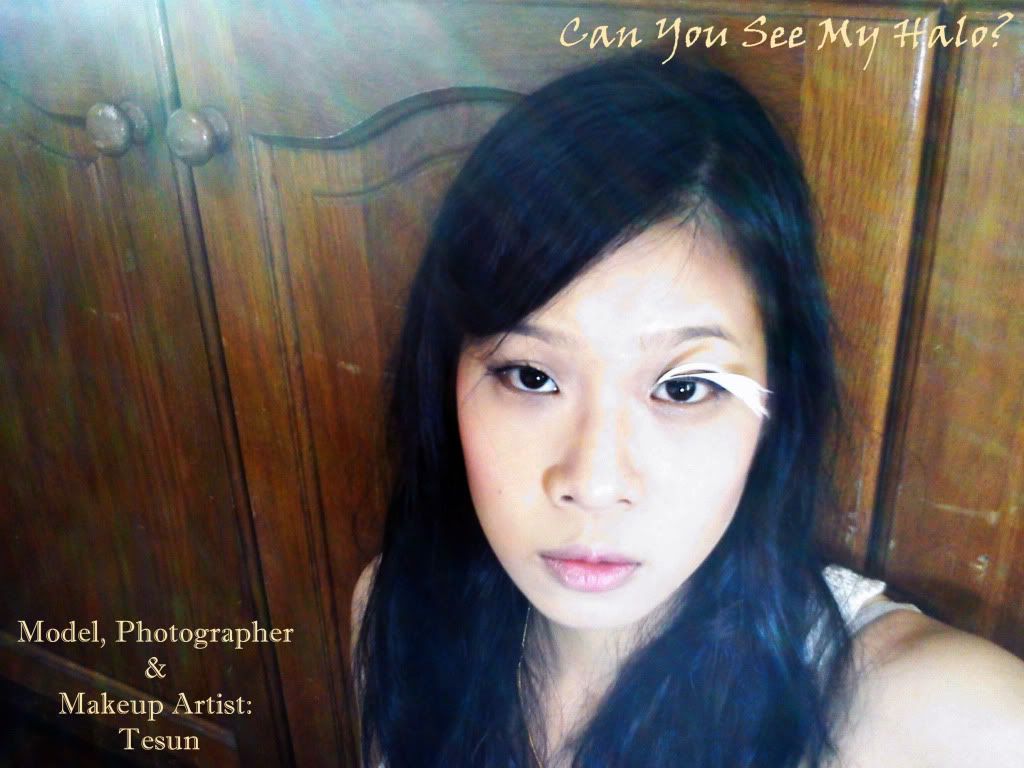
Rainbow PeacockCan You See My Halo?
Rainbow Peacock
 Editorial / Dramatic
Rainbow Eyeshadow ;p
Can You See My Halo?
 Editorial / Dramatic


Eyeshadow & Face Art 
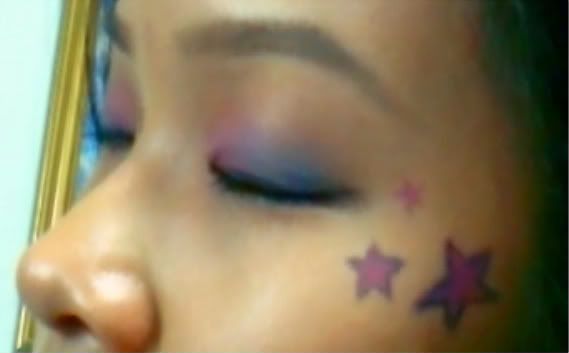
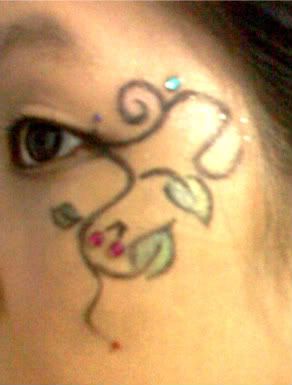
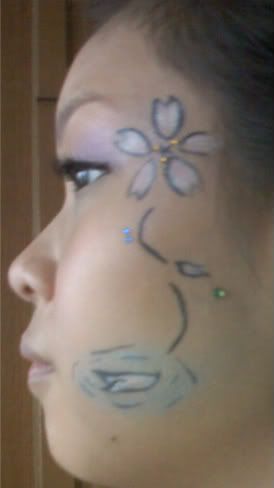
Pictures taken 2 years ago (Pardon the low quality images)

Stars and Rockets Cherries and Vines Sakura
Stars and Rockets
Face Art
Pink-Blue Eyeshadow
Cherries and Vines
Face Art
Sakura
Face Art
Swirls and Flicks

Swirls and Flicks
Face Art


FAQ

1. What products is the makeup service inclusive of?
I will be providing the following items for makeup service:
-BASE MAKEUP-
1. Moisturizer (to protect the skin from drying out from air conditioning and makeup)
2. Primer (increase the long wear of the makeup)
3. Color correcting (for red patches)
4. Concealing (recently added as I have obtained a suitable concealer wheel)
5. HD powder (to set the base makeup)

-FACE MAKEUP-
6. Contouring
7. Blush
8. Highlighting (if necessary. I prefer a more natural style achieved with just contouring)

-EYE MAKEUP-
9. Eye brow color change (if necessary. Please make the effort to get your eyebrows shaped. I cannot make hair disappear)
10. Eyeshadow (Please indicate 2 to 3 colors that you desire. I will use as many as required, but I need an idea of what you want to achieve)
11. Eyeliner
12. False lash Application (provision of false lash is available, additional charge will apply)

-LIPS MAKEUP-
13. Nude lipstick / purple or black lipstick
or
14. Lip paints

-MISC-

15. Makeup setting spray (increase long wear of the makeup)
16. Sponges
17. Alcohol spray and swabs (for disinfecting the makeup in between clients. I will always disinfect prior to the job and after)
18. Brush cleaner (alcohol based for quick drying so the brushes can be used again quickly)
19. Rhinestones and other accessories.

Yes, it's A LOT of stuff, so $15 or $20 per face is actually VERY LOW price.
Please do not ask me to lower the price.
     * Items not included in this list are subjectable to additional charges.


2. What products is the makeup service exclusive of?
I request these items be provided by yourself, for reasons attached:
1. Foundation and concealer (to ensure the shade fits your skin tone)
2. Mascara/ False lash (for hygiene reasons)
   * For false lash and foundation, I CAN provide but there is additional charges.
   ** There is no guarantee that I will be able to mix foundations to your shade


3. What information should I include when requesting for makeup service?
If you require me to follow a reference picture, please attach a link.
If you have your own makeup you wish me to utilize (for reasons like skin sensitivity or brand boycotting), please state and bring on the day itself.


4. I don't have _____!!!! What should I do?!
If you do not have the items I request you to bring, please inform me beforehand.
I can help with lack of foundation and false lash.
* Mascara will NOT be provided 


5. What kind of makeup can you do?
I can provide a variety of styles.
I typically tailor my makeup service to the taste of the customer. If you do not like obvious sparkling Edward Cullen style, I'll make sure you'll glow reasonably...
1. Natural style
2. Dramatic style (E.g.: stage makeup)
3. Cosplay makeup
4. Prom Makeup
If I am not confident of the makeup, I will inform you. If you are still willing to use my makeup service despite this, I will make my best efforts in practising before your event.


6. How do you charge?
Regular rate: $20/face
This includes:
1. Base makeup service (color correcting, foundation, concealer, contour and blush)
2. Eye makeup service (up to 3 colors of eyeshadow, eyeliner, false lash application)
3. Changing eyebrow color if needed
4. Lip color

Generally, the total price, inclusive of additional charges or discounts will range from $15 to $35, rarely will it go above this range.


7. *sparkly eyes* Any discounts?
I charge a discounted rate for persons aged STRICTLY <16
Student rate: $15
 This service includes:
1. Base makeup service (color correcting, foundation, concealer, contour and blush)
2. Eye makeup service (up to 3 colors of eyeshadow, eyeliner, false lash application)
3. Changing eyebrow color if needed
4. Lip color
Proof of age must be presented if requested.

There are discounts provided in the following events... (ONLY FOR REGULAR RATE) *
1. All makeup and tools is provided by you: Discount of $5 
    Note: Please do not buy 'cheapo' palettes (eg: Rhomlon brand) and expect high quality
              results. I will do my best...
2. Only Eye makeup and Lip color service is required: Discount of $5
3. Large group hiring of makeup service: Discount of up to $15 off total bill **
4. During events, makeup service rates MAY be jacked up due to demand. There will be a
    few slots available for booking at regular and student rates.
* Discounts are NOT cumulative. You will be charged the cheapest price, rest assured.
** Large group hiring is defined as >=4 people. Requires a time frame of at least 
    40 minutes/person.
    And is subject to my availability. Can be applied to student rate.


8. What are these additional charges? **
Additional Charges apply in the following cases:
1. Provision of False eyelash.
    Depending on the quality of lash, different prices will be charged.
    If you require lashes which I do NOT have in stock (e.g.: feather lash), I reserve the right
    to charge transportation fees in acquiring the lash.
    (Cost of false lash can range from $2 to $15, depending on type)
2. Provision of Foundation.
    An arbitrary cost of $2 will be charged, unless I am able to borrow foundation from
    others (i.e.: your friends)
    This is due to the hassle of having to mix foundations to your shade and providing the
    foundation.
    * I do NOT always bring foundations out with me, if you did not bring foundation,
       please inform beforehand to ensure I have something to work with.
3. For additional designs (e.g.: matryoshka face designs)
    Additional cost of up to $15 will be charged, depending on the complexity of the
    design.
    If additional designs are required, please state and provide a clear reference picture.
4. Special Effects Makeup (e.g.: scars, blood, burns...etc)
    Additional cost of up to $20 will be charged, depending on the complexity and the type
    of materials used. Please provide a clear reference picture.
5. Late charge.
    Additional charge of $5 may be implemented if you are later than 20 minutes from the
    time we have previously agreed.
    Appointment will be nulled if you are later than 1 hour without informing me.

    ** Note that prices are listed as "up to", the upper end of additional charges have been
        supplied, but are rarely applied.


9. Erm... I just want some cool butterflies and flowers!
Other requests such as face and body art can be commissioned as well.

10. Where do you do makeup?
I am comfortable with doing makeup in public. If you do not mind, I can make a trip to your photoshoot/event location, within reasonable limits.
I will NOT travel all the way to the east to do makeup for ONE person. Large group hiring may be considered.
If I know you personally / have met you before and judged that you aren't a psychopath, I am also fine with you coming to my house for makeup.
This is preferred as I will have my whole supply of makeup to use, instead of the those I packed for traveling.


11. What gives you the right to charge for makeup?!
>< If it bothers you that much, don't apply for this service...
I do NOT claim to be professionally trained.
I declare that I am self taught and do not hold a diploma or degree in cosmetology.
However, I am confident of being able to deliver if I take on a request.


12. Why did I not get a favorable response?
1. Makeup service availability is dependent on MY schedule. I am a student before a
    makeup artist... despite my wilting grades.
2. I reserve the right to refuse a request if I feel that I'm not able to meet expectations.